For several reasons I have to leave my bigger heli projects and I decided to get on with something with the PHT2 I bought. I decided on a 212 as I have a calendar with a beautifully painted one and am going to try and copy that color scheme. All will be revealed later.
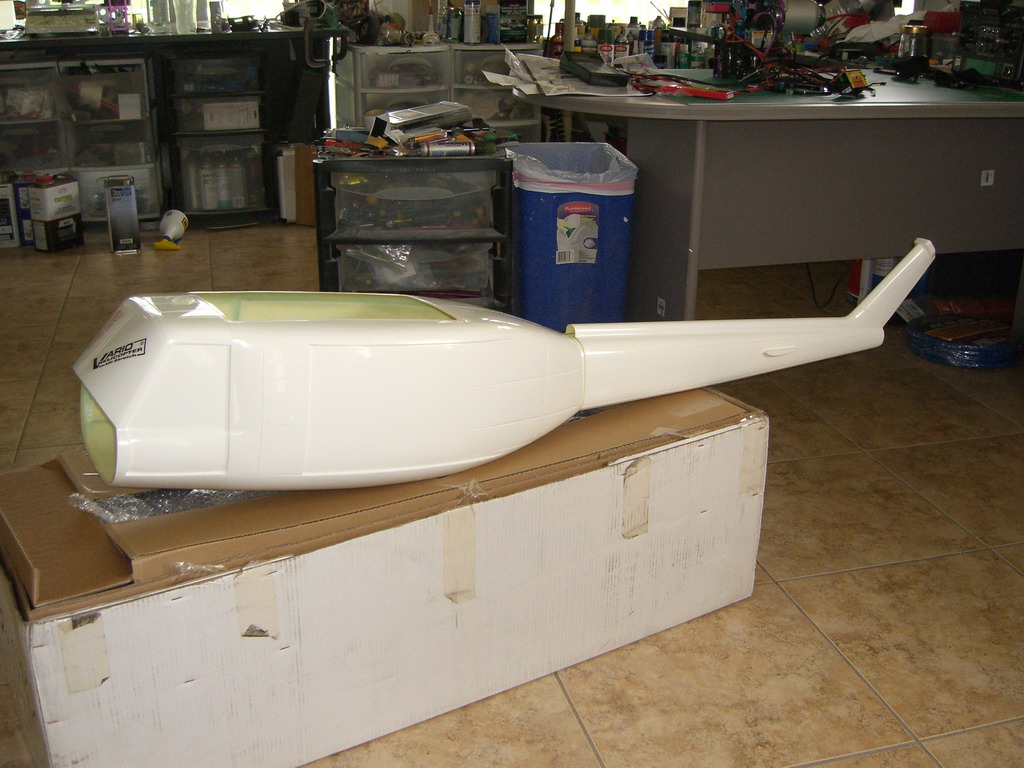
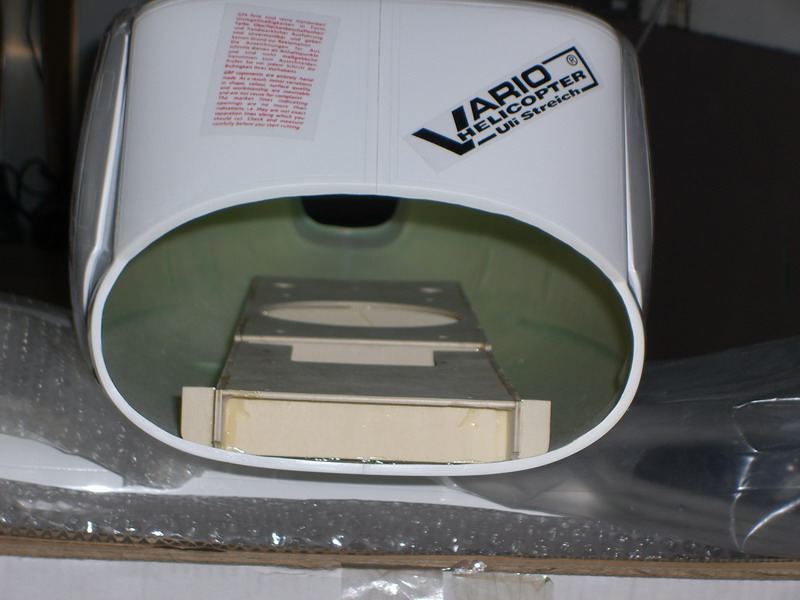
So I ordered a 212 for the Extreme from Joe and when it arrived I got stuck in. This is what I found when I opened the box
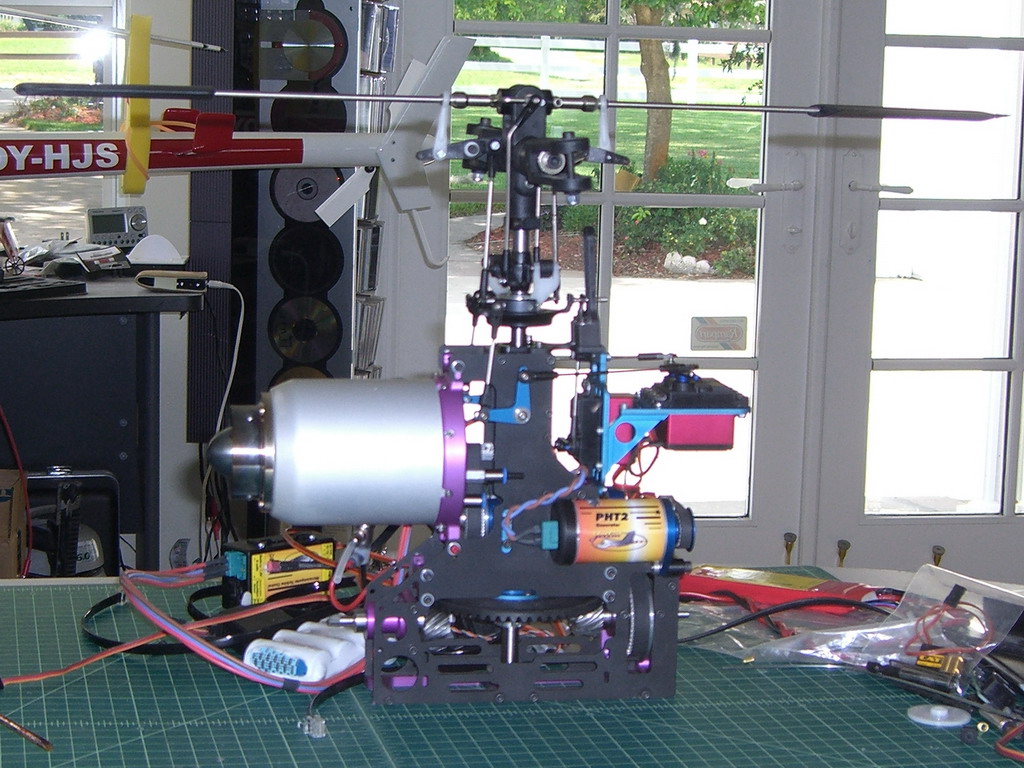
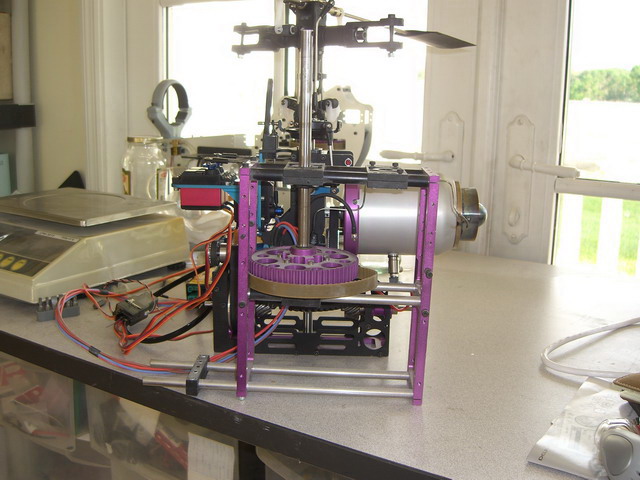
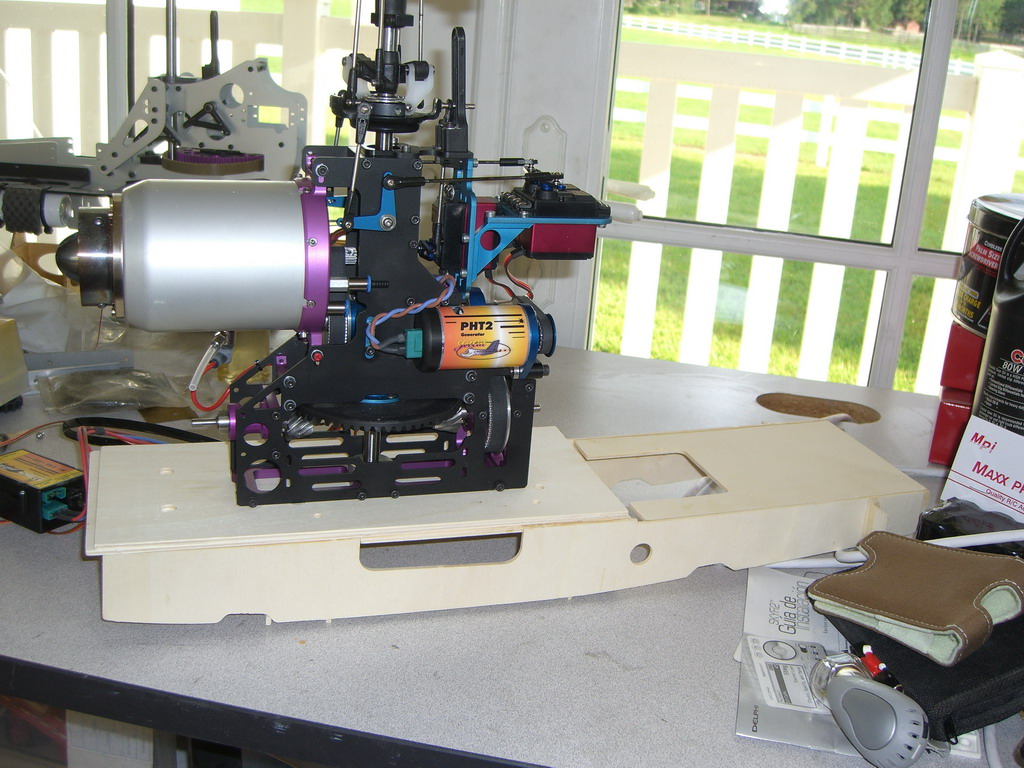
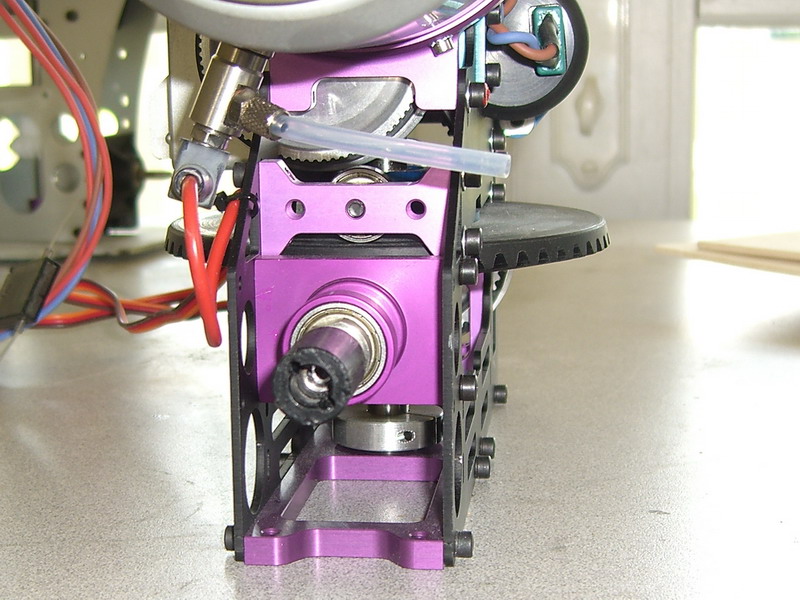
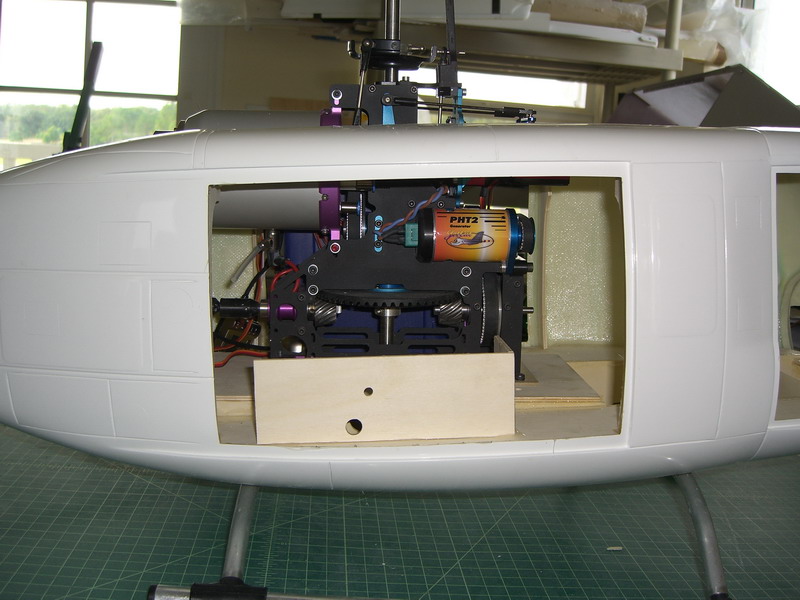
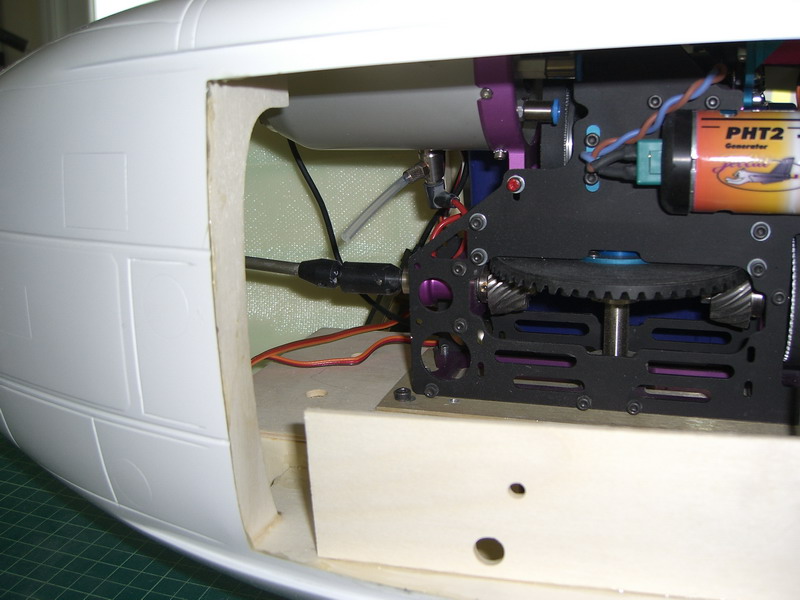
This thing is starting to look better and better. I spent the weekend building up the wooden base which supports the extreme mechanics and tried the turbine in their place
Some pix for you
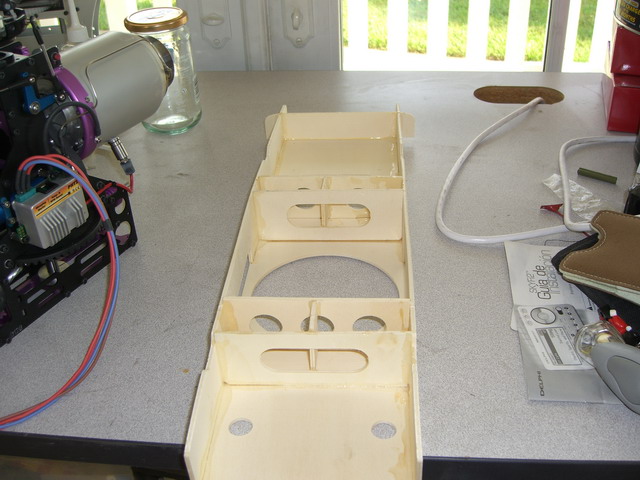
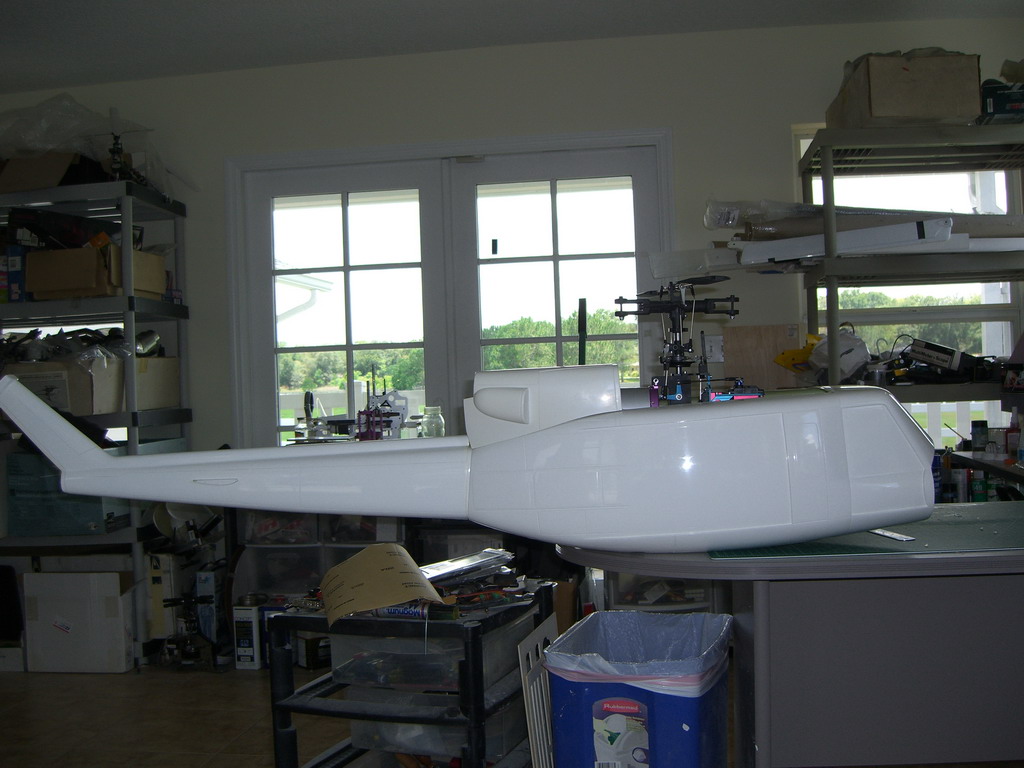
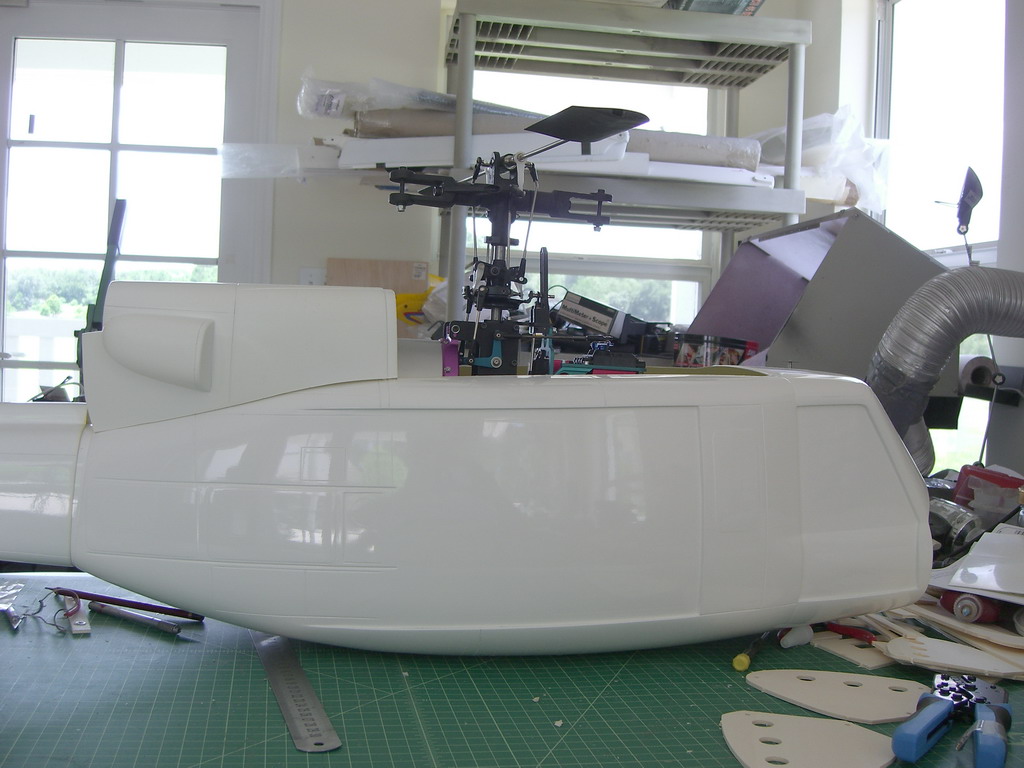
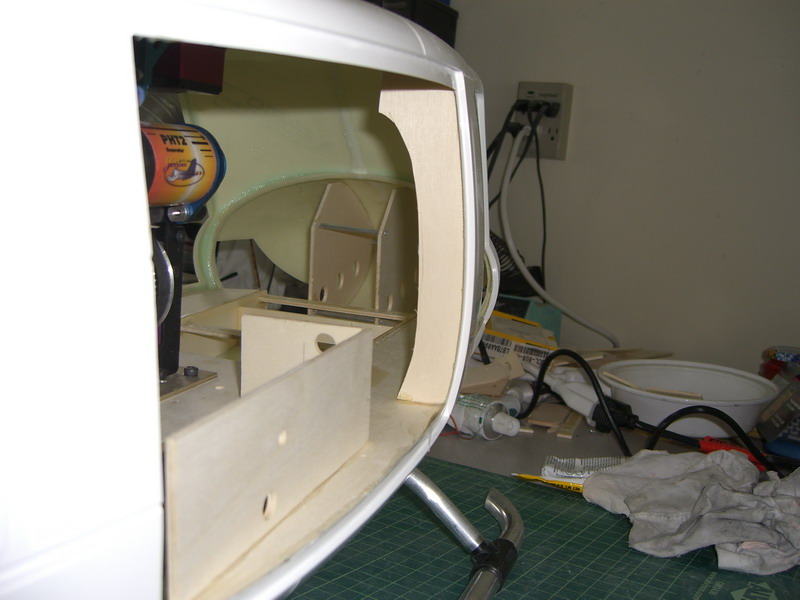
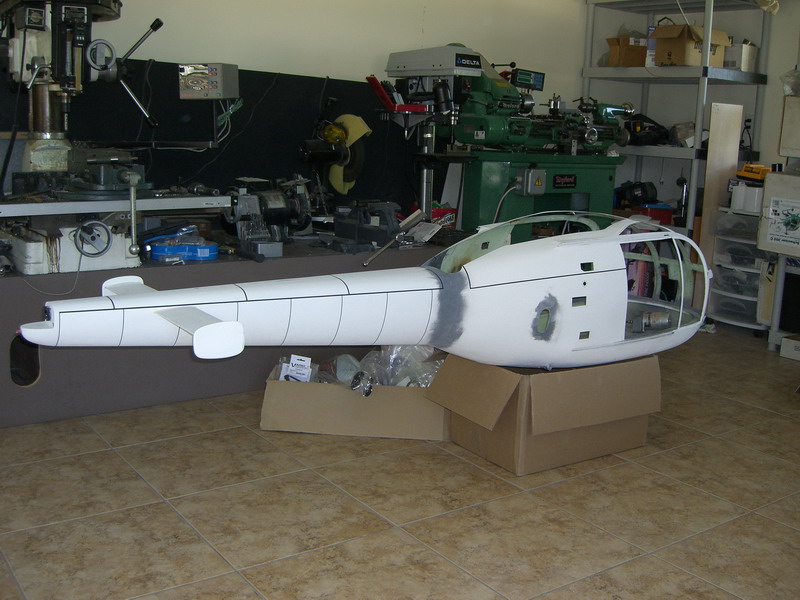
Back to work. The hole in the front was enlarged so the nose fitted easily, then the chassis was trimmed so the nose would pass it when I finally assembled it. I wanted to leave it open until the last minute as it will make it very easy for access and also I will be able to assemble the floor etc in the nose before fitting it.
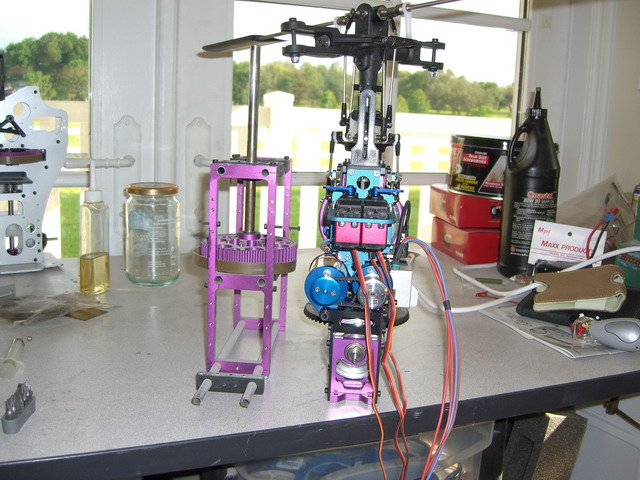
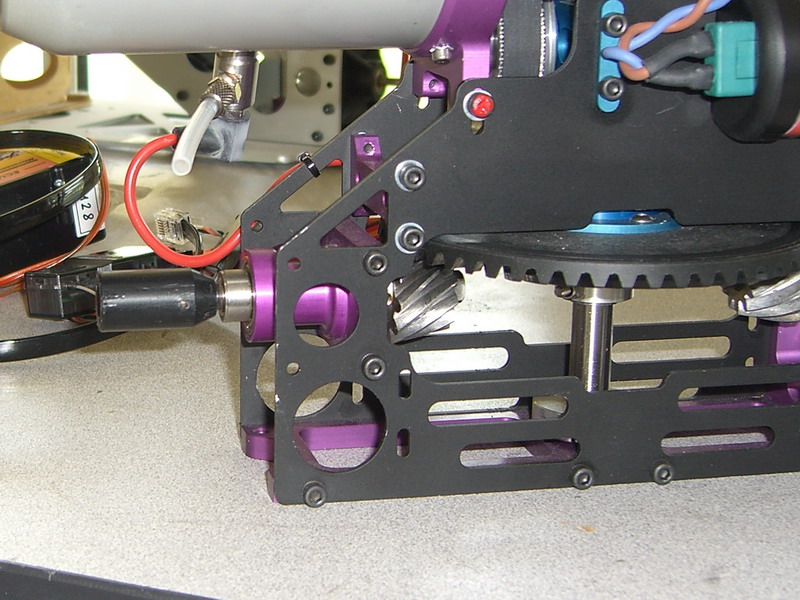
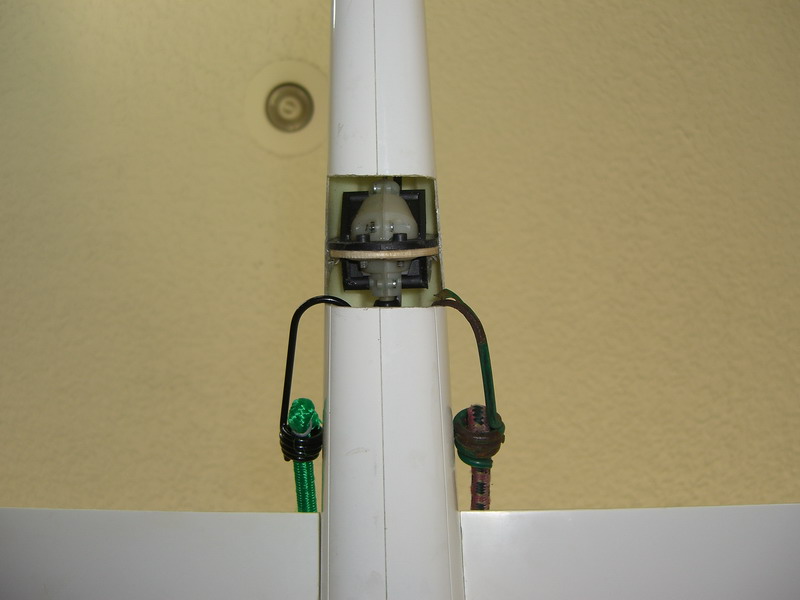
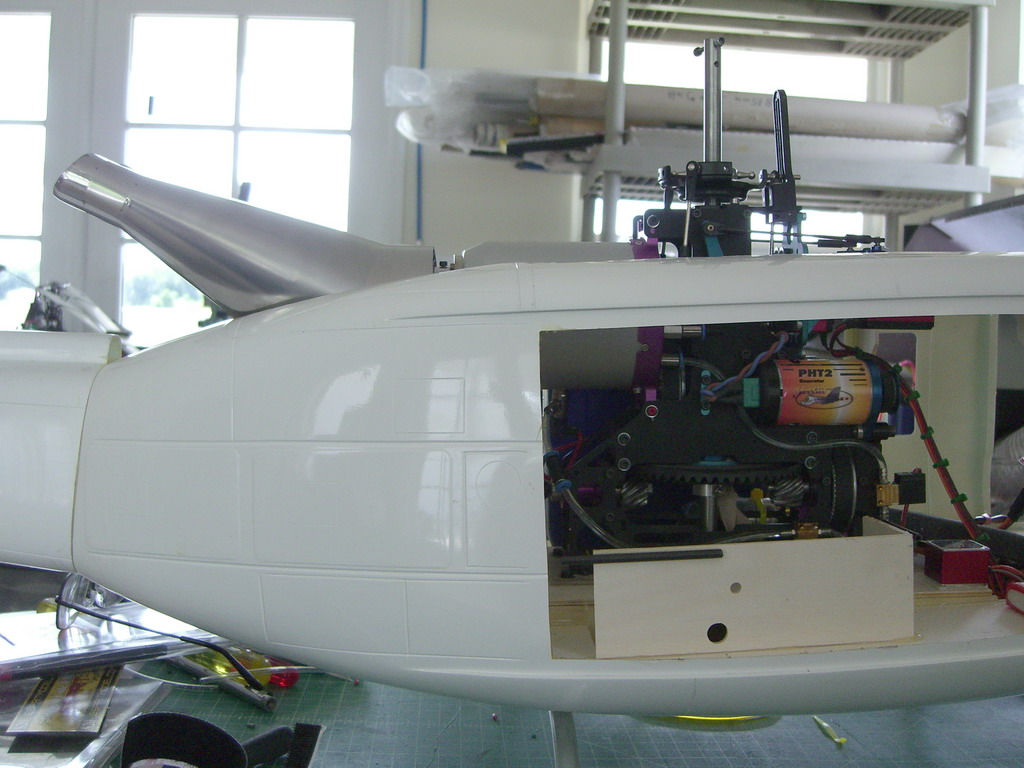
Work has been proceeding despite the silence. Its mostly the boring assembly stuff which is common to most helicopters so I haven't gone into great detail over it. The first thing I dd was to find some way of getting the tail drive out of the turbine. Jetcat have supplied a driveshaft which is only 5mm diameter and none of varios stock items are this size. Fortunately the bottomless junk box revealed a coupling I had made earlier which had a steel sleeve fitted into the plastic coupler and it was bored out to exactly 5mm.
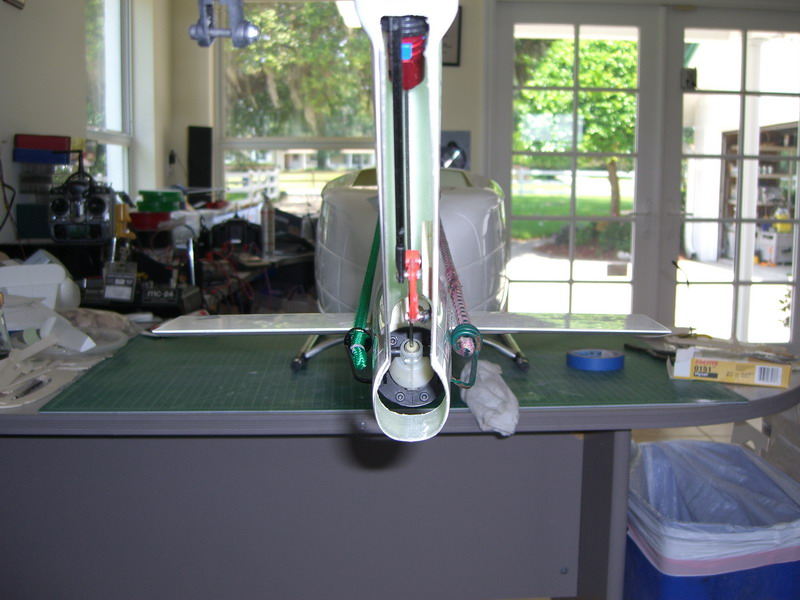
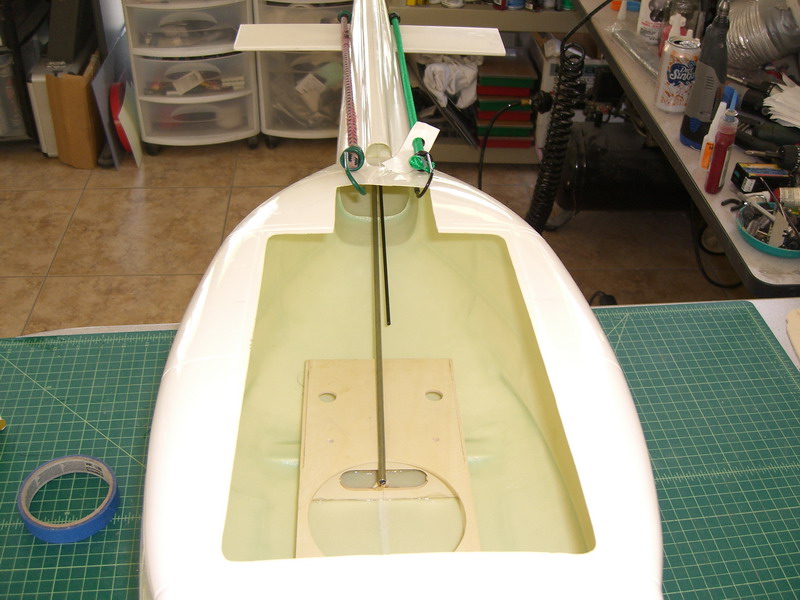
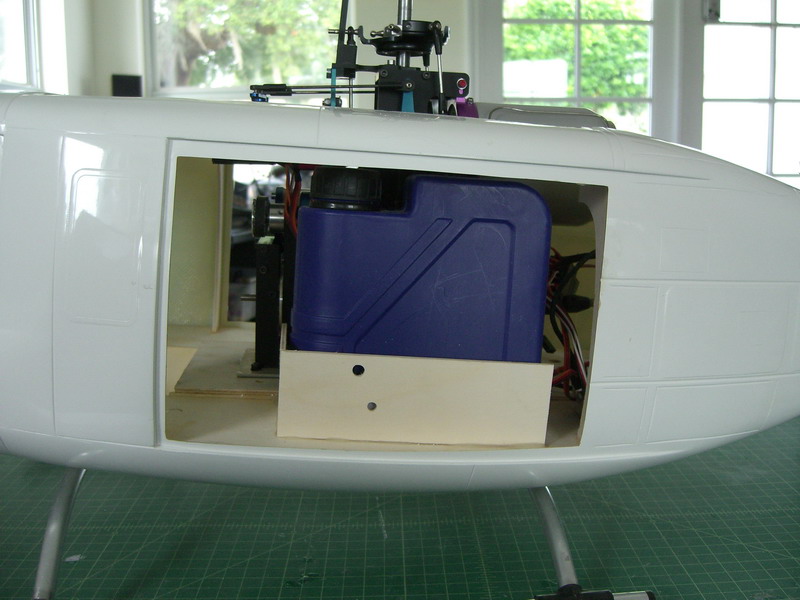
I have cut a hole in the woodwork around the chassis to accommodate the fuel tank. Then I added a couple of pieces of scrap wood to it to help firm the tanks location

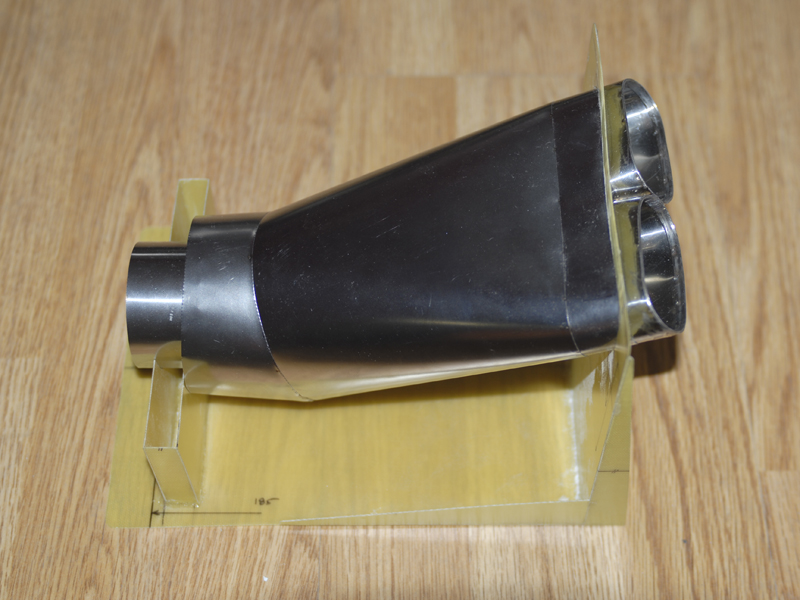
Now, I am getting closer. Instead of sending me an exhaust, Tam has sent me a picture. No doubt this is to justify the enormous cost of this work of art :laugh:
And here's what it looked like before the run up
Then a sequence of unhappy events occurred. Firstly the turbine was run up on the kerostart and spewed flames. I turned the starting kero level down and then it refused to start at all. I turned it back up a little and the turbine got all mixed up about something and was running 600+ degrees at idle, which ignited the fiberglass round the red hot exhaust. I put the fire out with my Mk1 fire extinguisher, the garden hose. Then I sent it back to Jetcat. Some weeks later I got it back with a note saying there was nothing wrong with it, a few minor adjustments had been made and the ECU upgraded to the latest software, I couldn't get it to start at all. A phone call to Jetcat found the kero injector as burned out. At $200+ a go, I decided to convert back to propane, replumbed it and away we went with no problems. Well except one. The new software only allowed 2 headspeeds, 1550 and 1680. I selected the lower of the two
I have it flying, but I am unhappy with the tail response. The tail is very twitchy and I hate that. I used a 770 gyro and an 8900g servo for the first time and this mornings job is to rip it out and fit a 502 and maybe a different servo. Then I'll try and get another test flight in but we are promised 30 mph winds this afternoon and storms tonight into the weekend. So I gotta get on it, but its close to being ready to finish and paint. The other worry I have is the tail rotor gearbox is getting very hot in the hover and that is due to the exhaust hitting it. It's getting up to about 60C after a 7-8 minute hover and I have to decide whether I want to do something about it or wait until I get it into FF and see if it is cooler when moving. So, the development continues...............
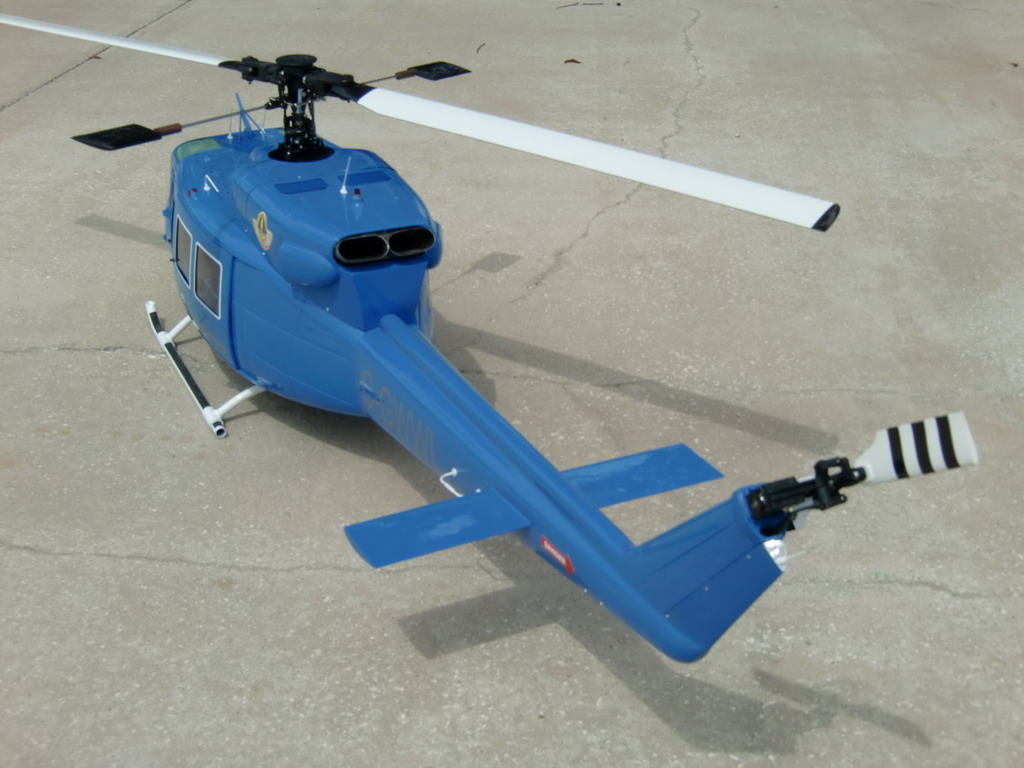
An update on the 212 progress. I have 4 problems to solve with this installation. 1) Loose tail 2) Overheating tail box 3) Unstable head laterally 4) Unstable head vertically I have been working on the unstable tail in high winds and not succeeding, but this weekend and for the first 2 days we had 83 degree temperatures, blue skies and totally flat calm. The only ripples on the surface of my lake were from duck farts. I pulled the 770/8900 combo and replaced it with a 502/94758 and that improved things. The 770/8900 went into a Trex 500 I had built and worked perfectly. Then I went through the whole tail linkage and removed any play and added a 1/4" CF plate to the back of the vertical fin as a stiffener in replacement for the soft wood Vario supplied in the kit. I dropped the gain by using a medium output arm on the servo and a long arm on the TR pitch lever, and then I set the TX gain so the gyro gain was 100% Bingo, no wag and pretty smooth. Next I fitted a Y diverter to the turbine to check and see if the exhaust was really causing the box to overheat. Temperature dropped from 65C to 35C so the exhaust will go back to Tam for some upgrades. First I want to get the rest of the model finished and flying and ready for paint so I can get on with the paint while I await the exhaust. The model was moving around constantly, wind or no wind, and it was impossible to hold in one place and flying the Trex 500 reminded me how stable a heli should be. So, I changed the rotor head for a Cuatro one which is one of the best rotor heads I have lying around. While I was at it I removed the 3 8711's and put in 4 Align 810's so I could use the Cuatro system 88 swashplate. Several test flights ensued. First I stopped and put the blades and paddles on the other way round Then I stopped and reversed the washout Then I stopped and put the blades back on the the first way round and flipped the blade holders and flybar pickup points Yep, changing from RH to LH rotation isn't as simple as I first thought. That improved the stability significantly but the helicopter was still too unstable for me so I added more lead in the nose to get it level. There's now 4lbs in there. Now it was a lot more stable. A video of the flight at this stage is here 212hd.avi It wont be there long as it takes up too much space, around 25 megs. Its only a short video for 2 reasons, one the tail box was getting hot and two, the sun was in my eyes as I forgot my sunglasses Now I have to solve the problem of the vertical instability, which will be simple in comparison requiring an s shaped pitch curve and some nice heavy paddles, but that's for when the weather gets warmer again as its only 74 today and its too cold to do any flying
I found that There was a resonance at full rpm which worried me. It sounded like the center bearing had come out of the drive shaft and the driveshaft was whipping around in the tailboom. I spent a lot of time messing with this and in the end replaced the couplers with the Vario large steel ones. I fitted a new driveshaft, rebuild the 45 degree gearbox and rebuilt the tail rotor gearbox. Then I fitted some new tail blades. The sound went away so it was one of those things. Now it flies pretty good and as I am gaining confidence I tried a 5 minute flight moving it around a lot. The tail rotor gearbox stayed cool. It only gets hot in the hover! I have built another tail rotor gearbox to go on the correct side of the vertical stab and I am still dialling everything in, but this is all in the radio and undoubtedly will change after paint and a cockpit etc are fitted. Now its on to the boring bit of sanding and filling.
ok boring bit over, now it's the messy bit. I have sanded and filled all the parts and then given it a coat of primer from a rattle can. The reason for doing this is that it has been too cold to go outside and set up my spray booth to do 2 part primer, so I primed the small parts in my indoor spray booth and rushed outside for several quick coats on the rest of the body. Then a good wet sanding with 600 grit to get a nice smooth finish followed by a few hundred rivets. Then its off to the paint booth.
You may be surprised that the first color to go on is a complete coat of blue when the only blue parts are some stripes here and there, but all will be revealed as we progress. Thanks to Joe Howard for this way of doing it, it uses a lot of paint but makes the job much easier. Notice the thermometer shows a massive 60 degrees inside the spray booth. Setting up was cold work.
Well, that was a mistake! I asked for that color of paint, without specifying it had to be base coat/ clear coat. I just squirted it on and covered everything with 2 coats, not really bothering about it as I knew it was going to get rubbed down before it was masked or sprayed over. As you can see from the picture, the result is very shiny, and apart from one or two minor spots, it has come out as one of the best paint jobs I have ever done. So, it's staying blue.
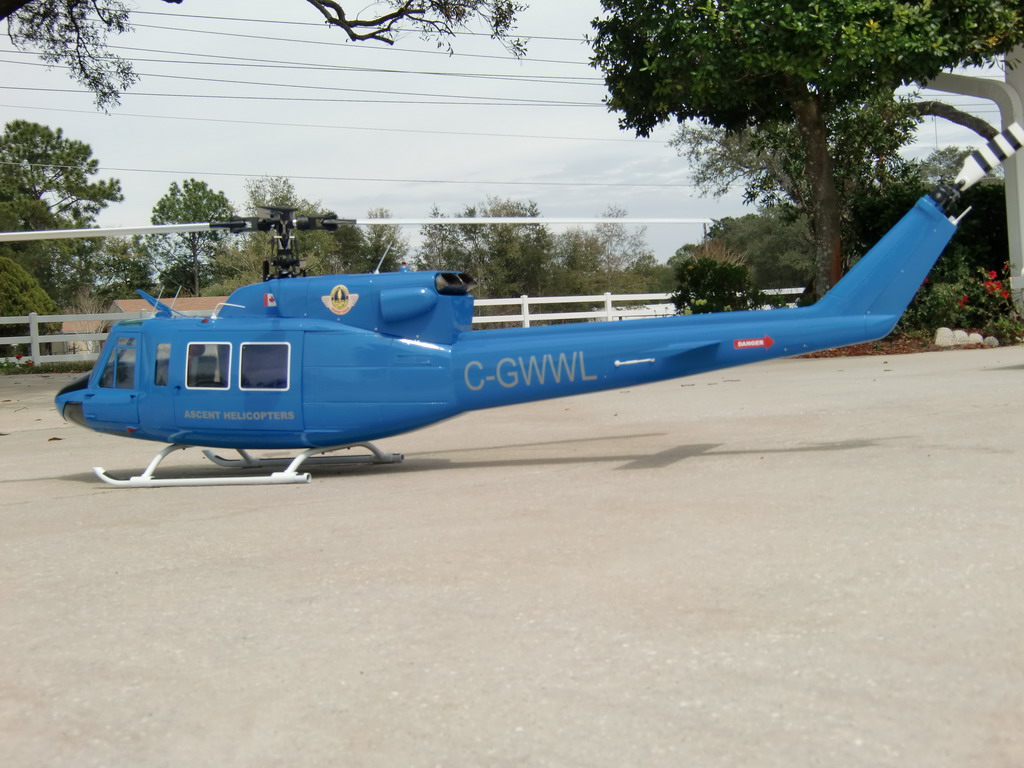
The next problem was to find a subject which was also blue and fortunately I found one which was a pretty good match, so it will be one of them. More to come, but not soon, as this is a single stage paint, it will take a while to get fully hard. I found this out when I masked off the nose to paint a satin black area and the masking left marks in the paint which will need to be polished out. Nothing dramatic, but I'm in no hurry to mess it up
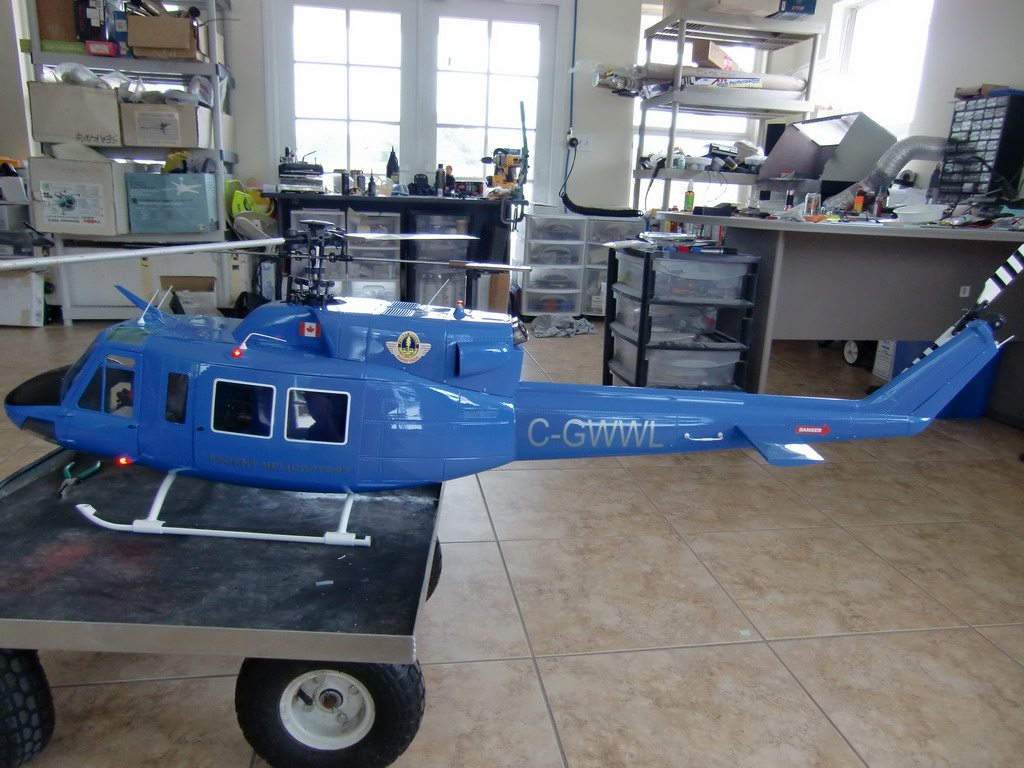
After some time letting it dry, I fitted the windows and doors, and the reinstalled the mechanics. The electronics went under the cockpit floor and I decided to use LiPo batteries which also went under there, but with the balancer leads brought out near the charge jacks. Extra screws were fitted in to hold the top deck in place as the original molding was pretty bad. Anyway, here's how it turned out
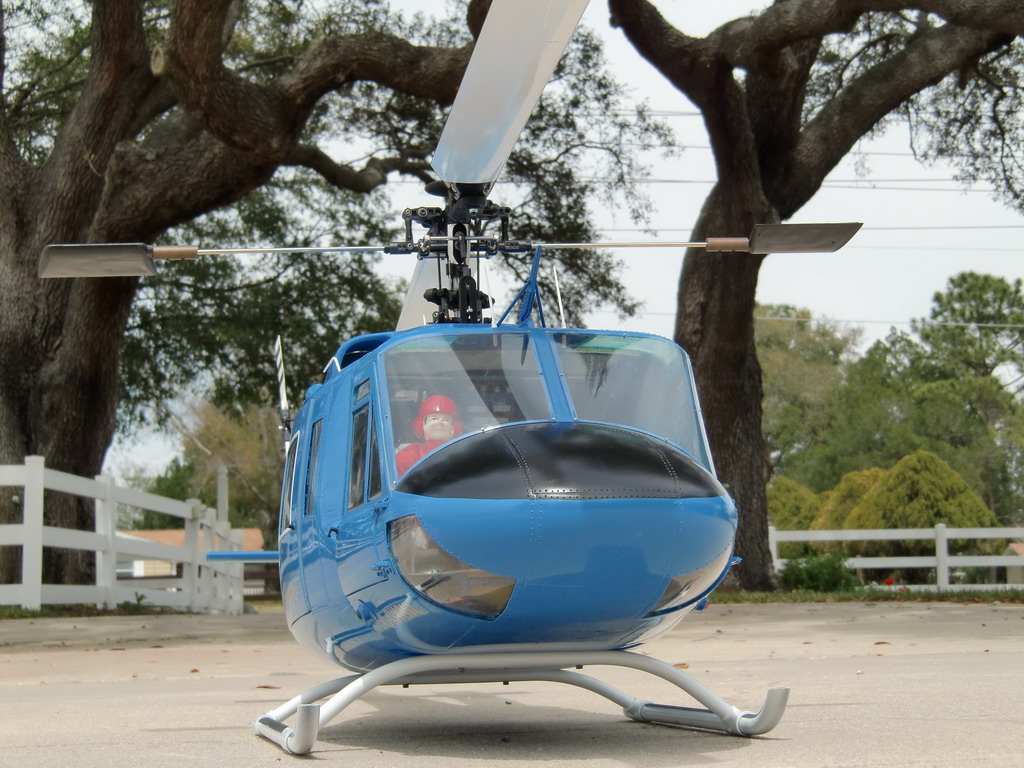
Getting the RAPATTACK logo was difficult but with the help of a fellow modeler from Canada called Paul, I finally got a reasonable copy
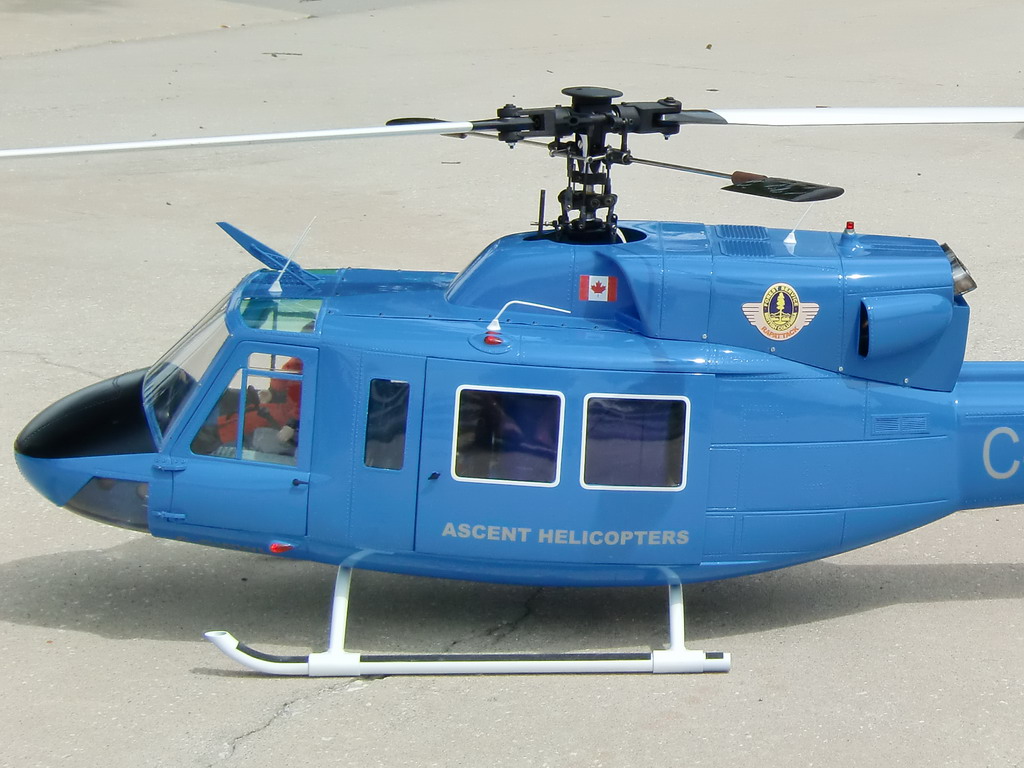
I had fitted a prototype lighting system I am having developed to sell. It will have a double strobe light, beacon and switchable landing light as well as 4 sets of navigation lights. You can see these lights well in daylight
A quick test hover in strong winds showed it still flies and its very difficult to keep in one place, but I guess I'll enjoy flying it around. I'm going to fit some heavier blades on for the weekend so I will see how it flies then. 1600rpm on the main rotor still scares the crap out of me as I'm used to 900 rpm, but it seems to be holding together so far. I'll try and post a video if I get to fly it this weekend.
Adding heavier scale blades certainly helped, and I took 2 lbs of lead out of the nose to try and slow it down in forward flight.,It didn't make any difference. What I traded off in nose weight I gained in thrust from the exhaust
The next task was to make an instrument panel for it and I had bought a 3D printer so I set to work.
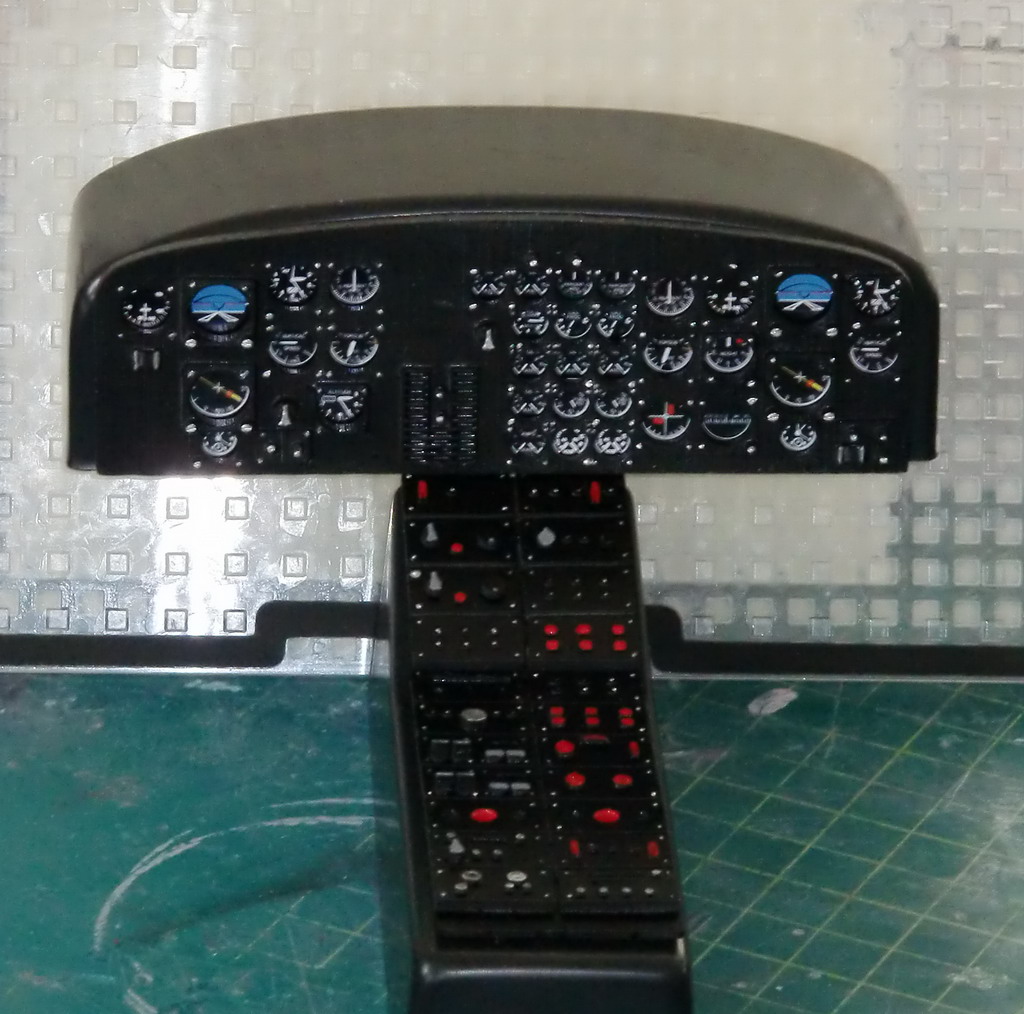
The bad news is.....you cant see any of the dials from outside the helicopter and you cant get your head inside, but I know it looks good so I am happy
A video of it flying is on you tube at http://www.youtube.com/watch?v=IbOYhfla0PE