412 testbed
When East Coast Scale Helicopters started to import Marvelcraft fuselages and Helimanufacktur mechanics, I thought one would make a nice project. I had been approached by Sidney Wong of DJI systems to do some beta testing on a new stabilization system they had developed. I had originally intended to put it into my EC 120 but had problems getting a 3 blade swash plate for it and then the Marvelcraft system came along. It seemed a better scheme to me as I had a Trex 600 lying around waiting for a home so I could do the development on that and then fit it into the fuselage.
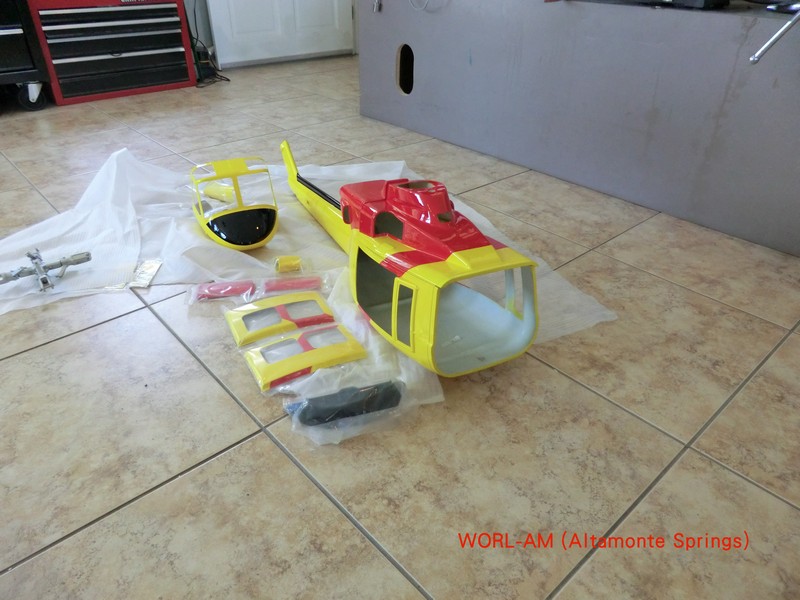
The fuselage arrived in a very well packed strong box and it took me a while just to get into it. When I did I was amazed at the quality of the fuselage and the overall kit
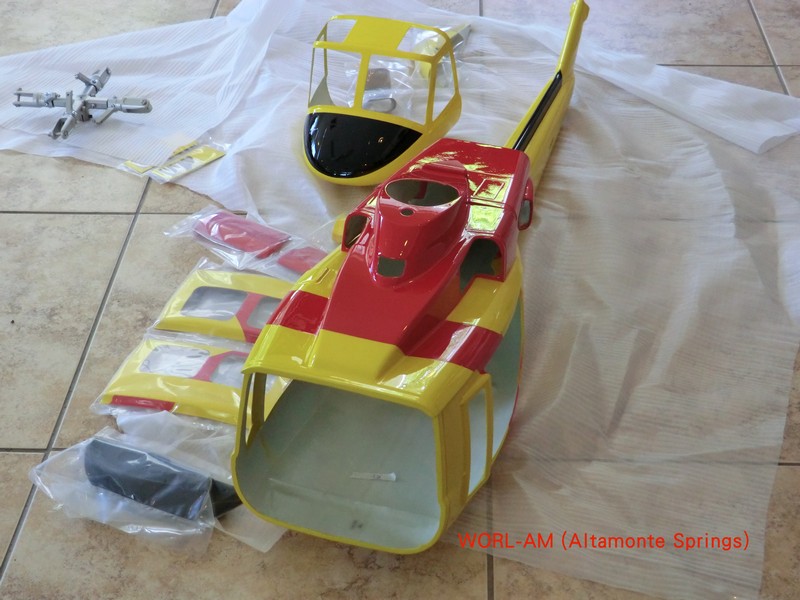
The paint as as good as any I have ever seen and certainly a lot better than I can do. Just superb quality with no runs, overspray or color runs across panel lines. Then there was the rest of the kit. It came with a full cockpit, external antennas and wirecutters. It also had a very nice set of gears pulleys and bearings which are used on the Trex to reduce the height of the belt drive. A further bag of parts included the angled tail drive assembly. It also came with the 4 blade head and swashplate I had ordered which were extra to the kit.

This was made by helimanufaktur in Germany and it is gorgeous. There is no play anywhere. It is just smooth and solid. The only thing I didn't like was the screw head blade bolts which Joe will change out for cap head bolts when other rotor heads are sold.
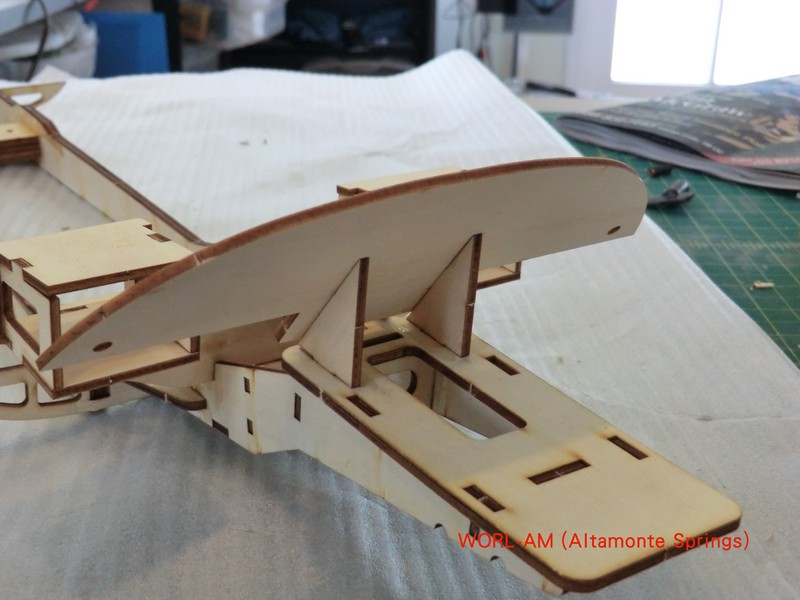
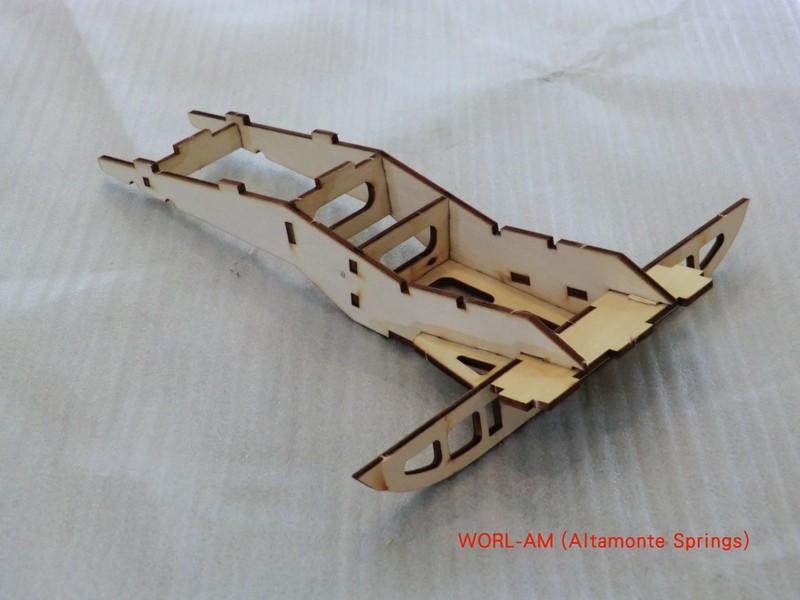
I started reading the instructions while looking at the enormous number of laser cut pieces of wood. Well, I'm getting old and I need as much help as I can get. The instructions were somewhat sparse but I eventually figured it all out and used all of the pieces of wood which was a good sign. In case you want to build one of these, this is how I did it but I recommend you take the manufacturers advice and glue it once it is assembled. I had to take it all apart to take photos of the assembly once I had it all figured out.
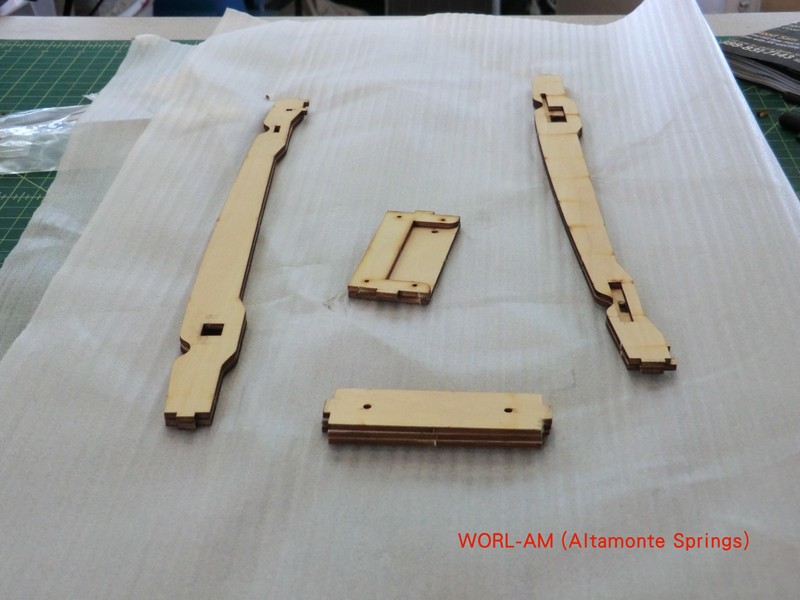
Start off by making up these pieces gluing them all together. DO NOT COPY MY SIDE FRAMES. I glued the right hand one correctly and the left hand one should have had the bottom piece on the top. Fortunately I used slow CA and got it apart before it set and could put it right.
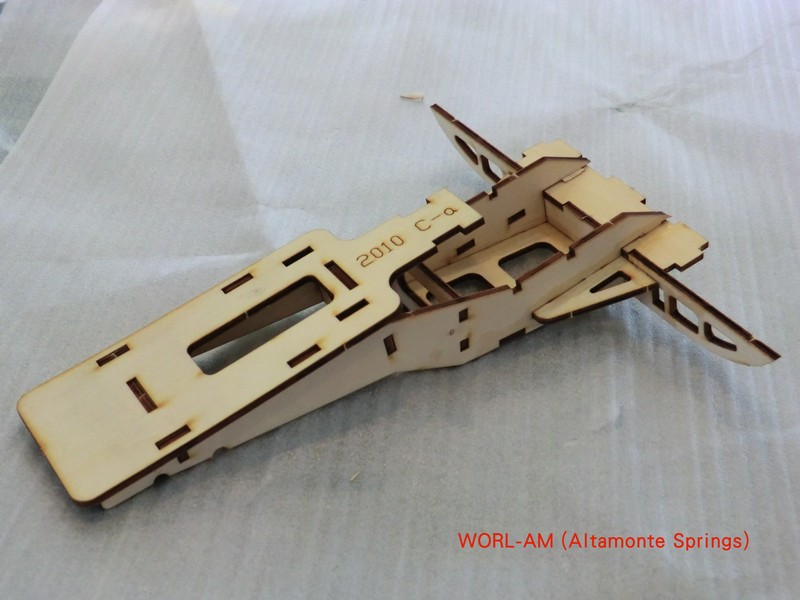
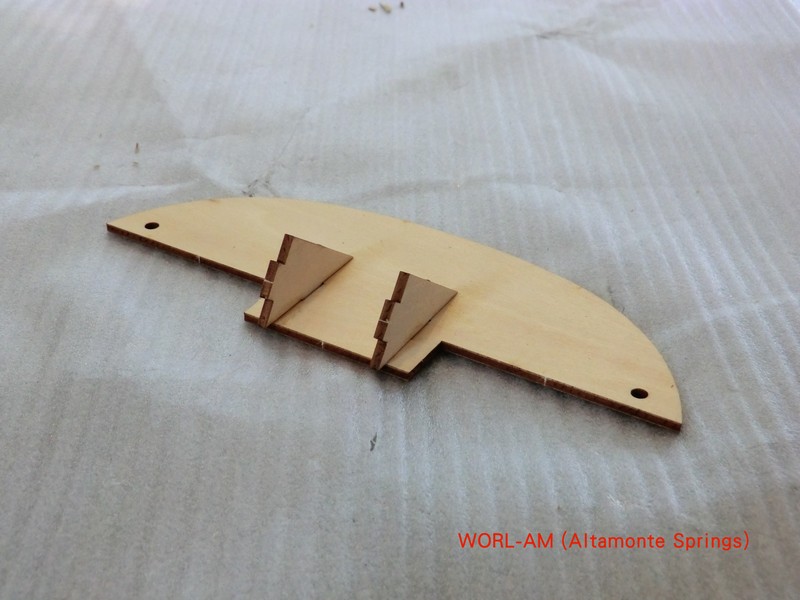
Then find all these pieces and click them together and glue them
Stick that bit on top and glue it.
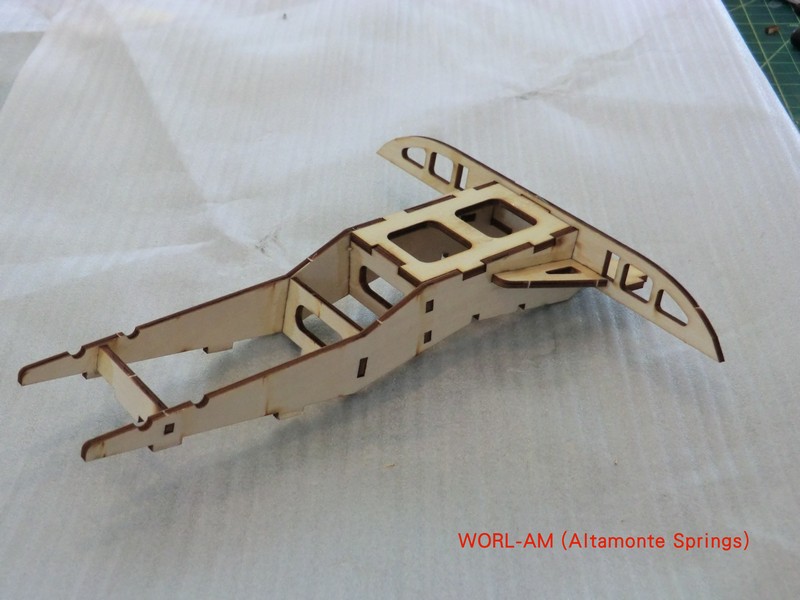
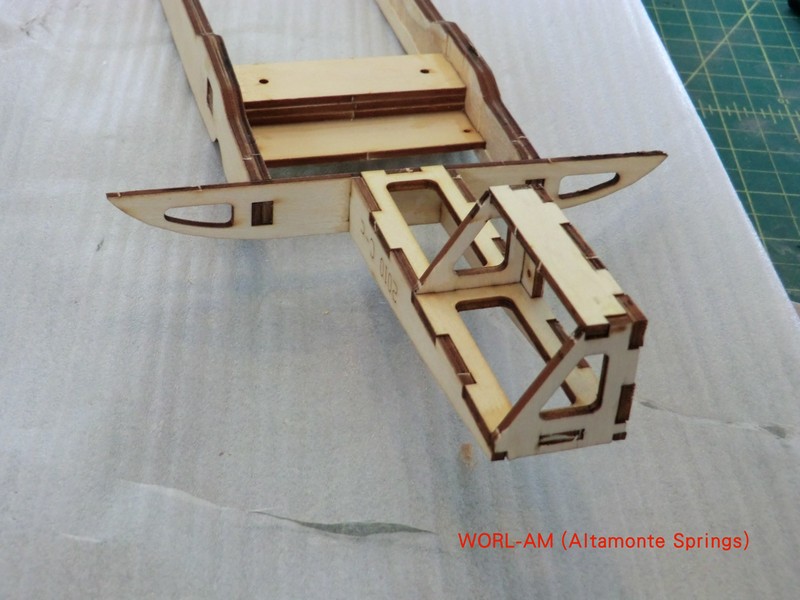
Now assemble the side frames onto the end plate. Add the two sub assemblies and also add the flat plate under the nearest one
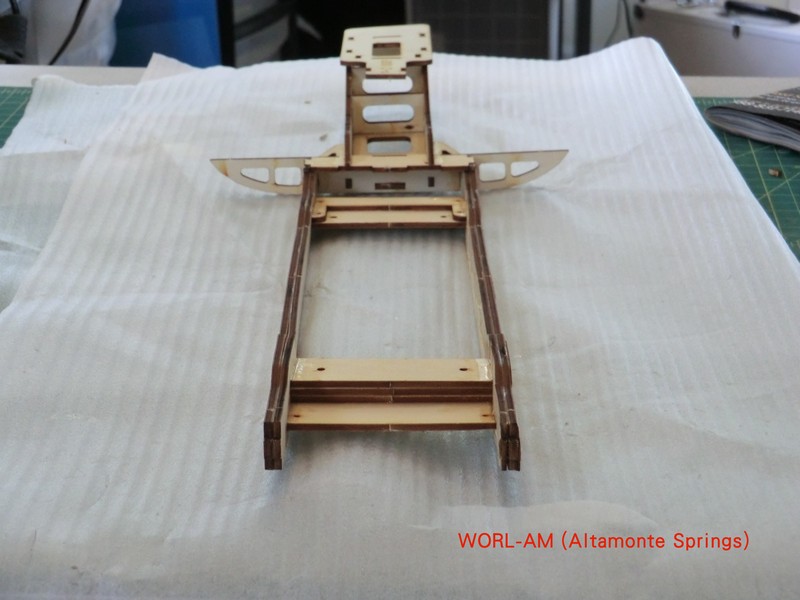
Make up the tail servo mount as shown. The Raptor has the servo on the other side so be sure you have it the right way round. Then glue it together and onto the end of the sideframes
Put the seat support piece onto the frames and then build up the seat boxes
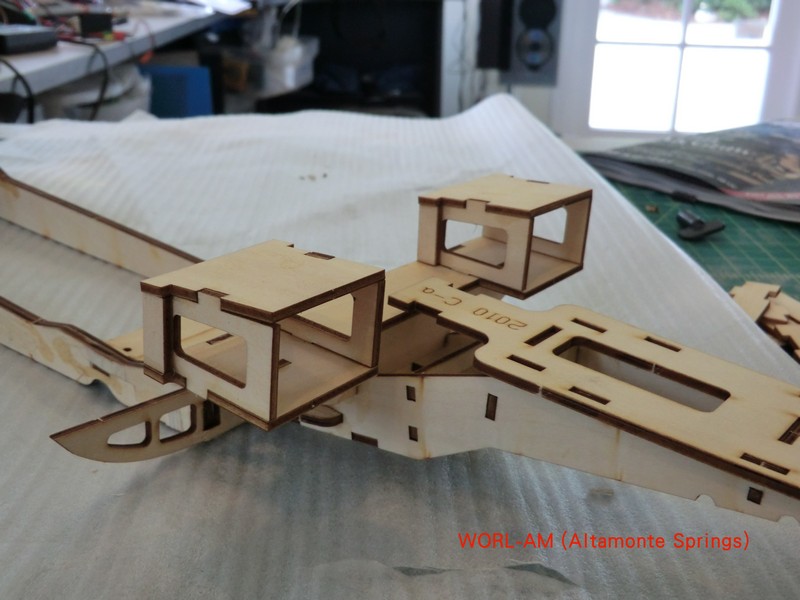
The last part is the dash board support
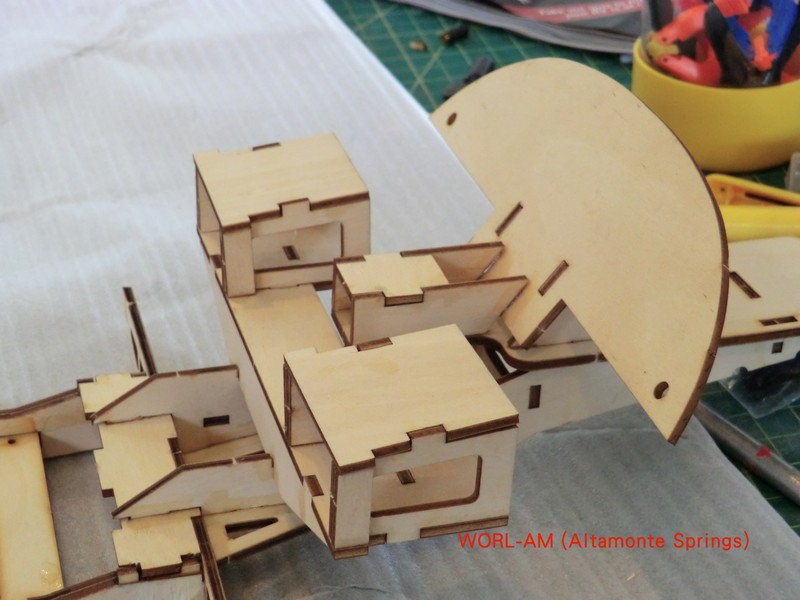
And thats the woodwork done. It took me a whole day to figure out but I hope this will help you cut that time down dramatically.
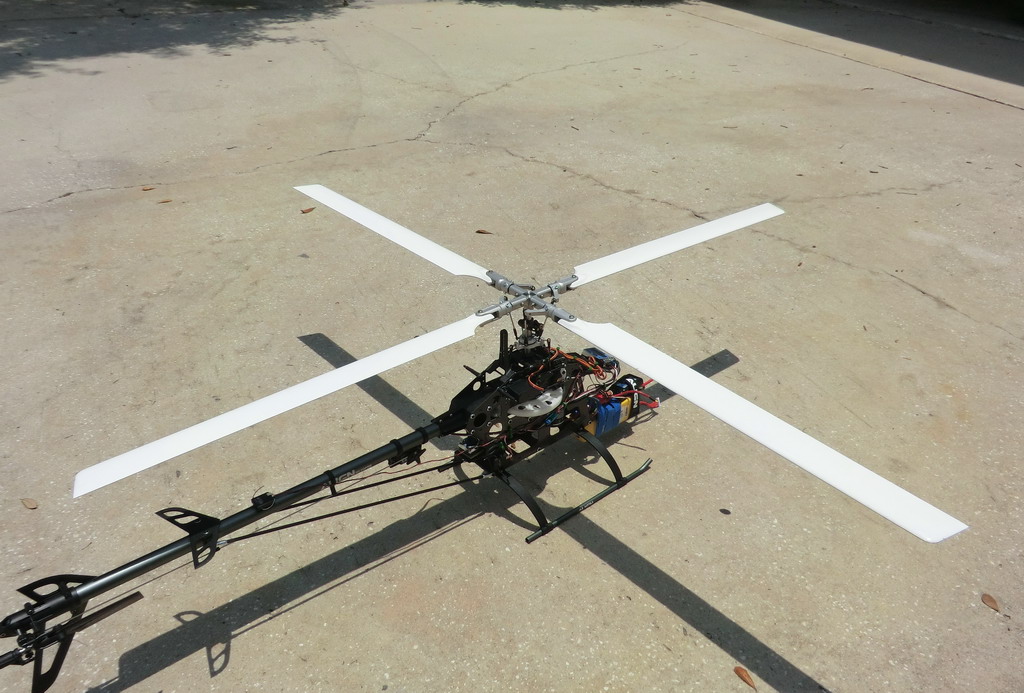
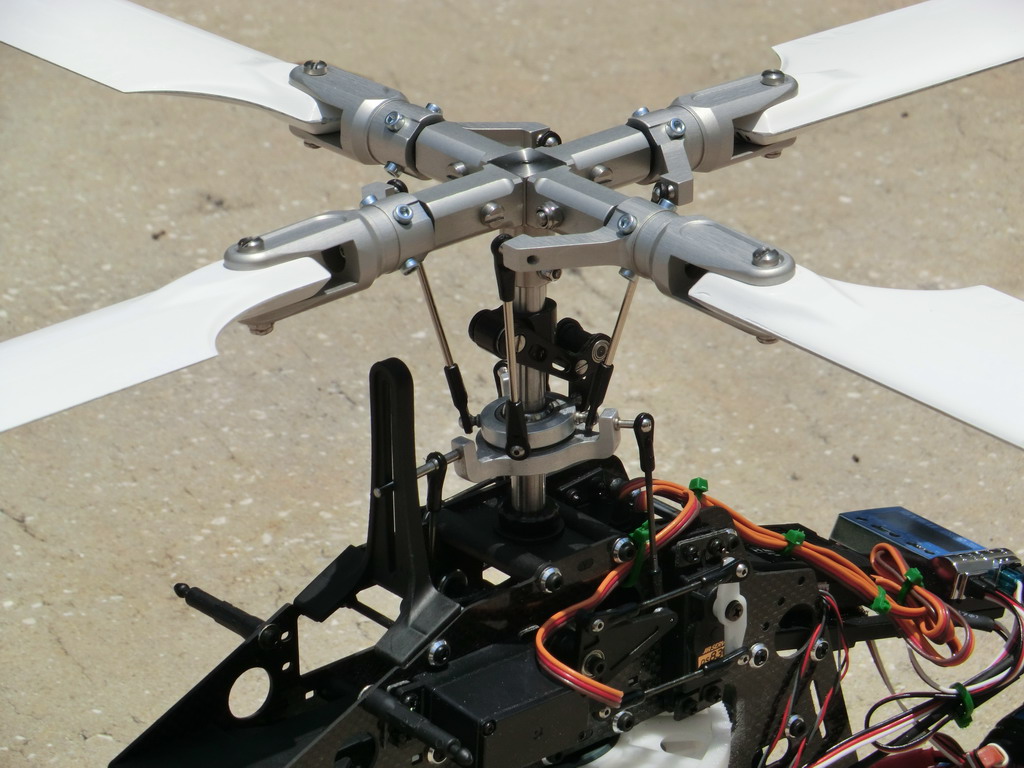
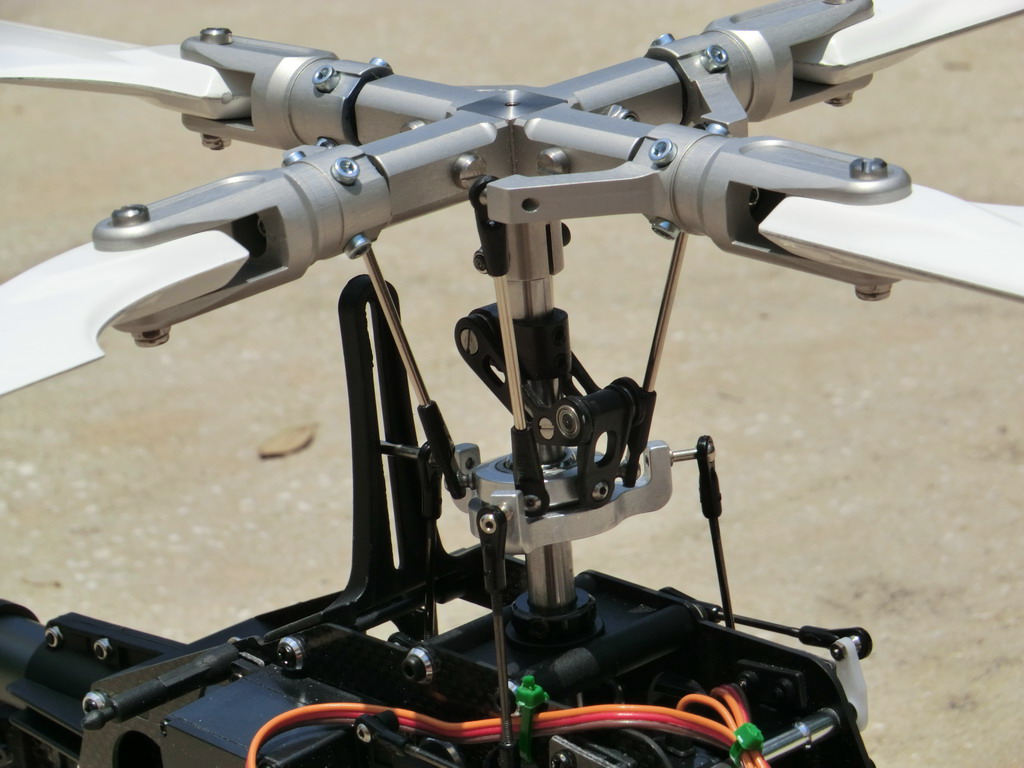
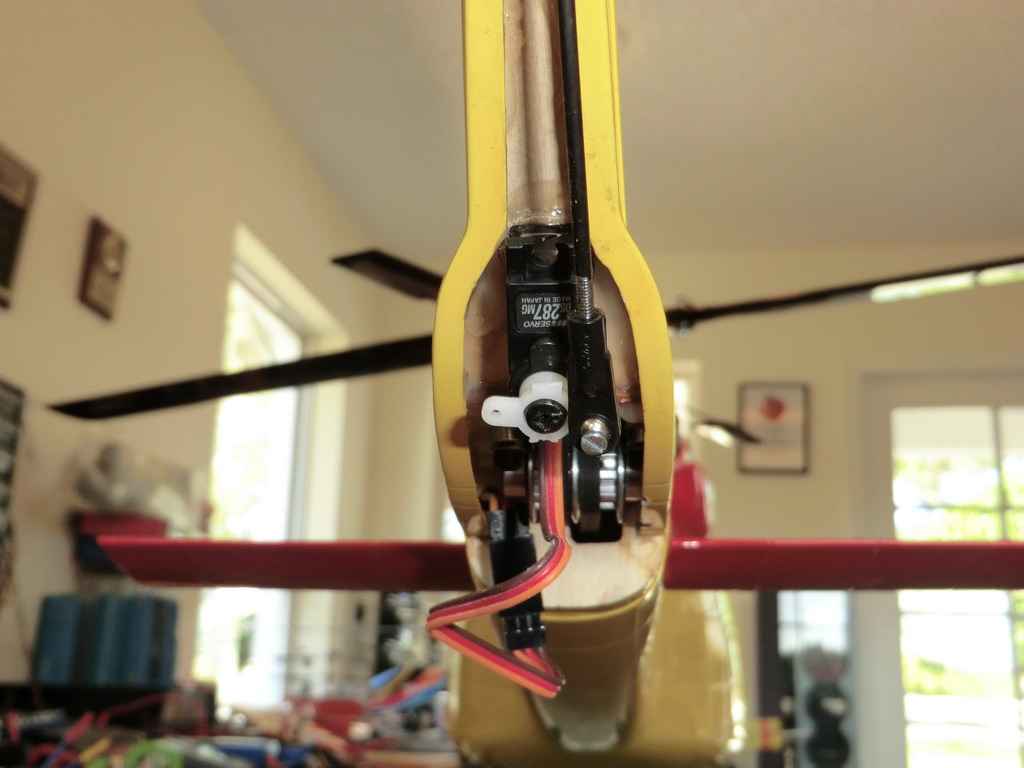
Everything ground to a halt while I waited for parts to arrive and the last parts came in this morning. I finished the assembly of the 4 blade head on a previously flown stock Trex 600 and went outside to check the way it flew with no head gyros. It was great! Well until a gust of wind came up and ballooned it and then it sunk down to the ground pretty quick. I was fearful of over speeding the rotor head and I could feel that I was using a lot of collective by running the head speed even slower than the 1450 I had set the 2 blade at, but it looked like I was doing 2900 rpm with the extra 2 blades on it it, and I'm not very used to 1500 rpm! Anyway, the flight was 2-3 minutes, when I got it down the motor was hot, the ESC was hot and I was hot as the temperature outside was 97 degrees today. At least the battery was cool. So a much lower KV motor is ordered and I await that before the next trial. I will also change the swash driver for the Helikopter Manufaktur one before it arrives. If you are making one of these, you need to order Vario 2.5mm ball links and 55 mm push rods and set the distance between the inside ends of the ball links at 43mm. The rotor head needs to be phased so when you give it forward elevator the swash dips down and to the left at the front. Here's some pictures of my setup
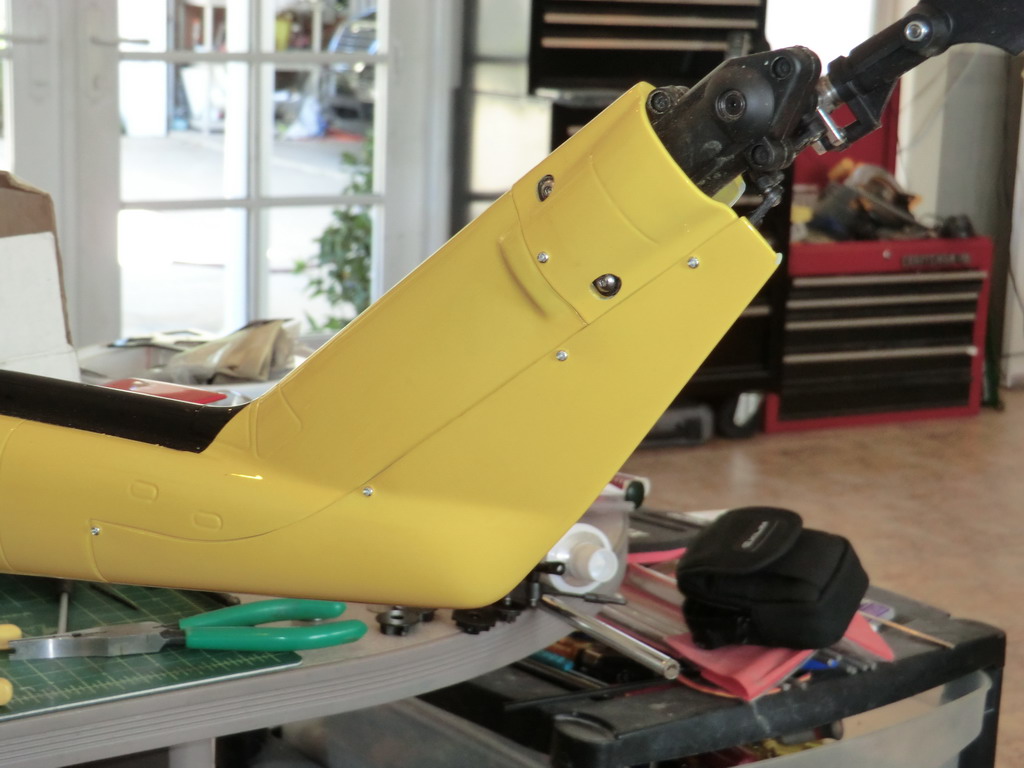
Fast forward to Christmas time. I finished the 412 as much as I could in time for IRCHA but it wasn't right in the tail control area. I sold it to a friend at a silly price, simply to get rid of it so I could move on it bigger and better things. Joe had other ideas ad sent me another one! He also included a Chaos 600 kit which is more of what it was designed for, but not entirely. The model was designed to go with the Chaos 600 glow kit not the electric and of course they had different foot prints
Anyway, I started work on getting the 600 flying and I elected to use cheap Chinese servos, a cheap Chinese motor and ESC and a cheap Chinese regulator. I did not like the way it flew as I was trying to set it up to use the 4 blade head at 1450 rpm. In the end, the Turnigy servos were binned, the motor was put to one side as too slow. The ESC was binned and that increased the motor speed dramatically, but the voltage regulator worked. $4.99 for a 5 amp regulator was good.
I ended up with an Align 1100 kv motor, Align 70 AMP ESC not in Governor mode, and align 13 tooth pinion drilled out to 6mm and found I needed 1700+ rpm to get the heli off the ground.
Meanwhile, my main concentration was on the tail area. I fitted a Spektrum micro servo in the fin and tried that. It dies after a couple of flights. Then I fitted a JR DS287 and put the ball on the inside of the X arm. The tail would not stop wagging and was way too sensitive.
Then I got out the smallest arm they supplied and fitted the ball on the outside, expecting it to hit the tail casing. I even had to turn the travel down to 70% to get reasonable control and no wagging even with the gain at 20% on the gyro
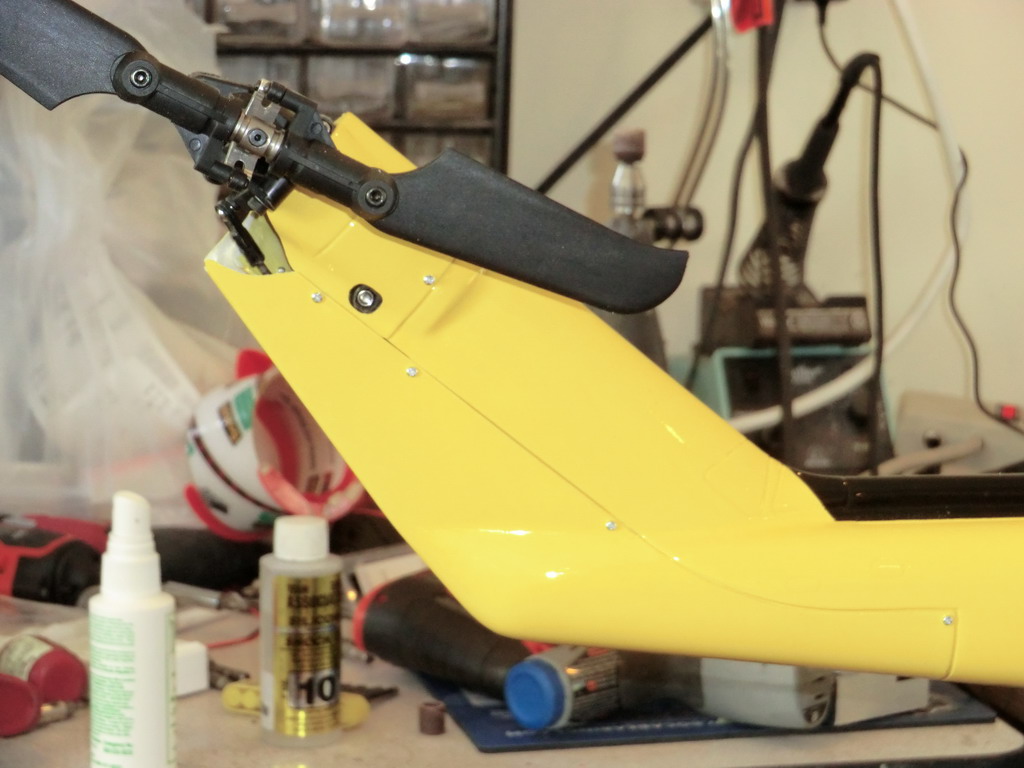
With the ball in this position, it doesn't look like I will have enough tail travel, but I have good control with the 2 blade head, much to my surprise
So I spent a happy hour filing and sanding to get the tail covers fitted and this is how it turned out
To sum up the build on this thing apart from the obvious here are a few tips
1) Use a Chaos 600E as the mechanics but buy a set of Align ball links and replace all the Chaos ones with them
2) Make up new mounts for the mechanics buy putting a 3/8" square block of wood behind the Marvelcraft rear mount and drill through it in the center to make the holes for the mechanics to bolt through. I used pan head bolts which were easier to get at when the frames were ground a little to make a groove
3) Make up the woodwork for the front cockpit and secure it to the main chassis firmly, it will have to support the nose weight
4) Use a small servo in the fin with limited tail rotor travel. As the tail rotor direction will be reversed, you need to have the pitch slider able to go fully out but not necessarily all the way in
5) I used an Align ESC, with a Turnigy BEC and an Align 1050 Kv motor. The best slow headspeed was about 1700 rpm and a 14 tooth pinion on 6S should get you in the ball park
6) I stuck with the 2 blade head for the time being. I need more pitch or speed on the tail rotor to get a strong left turn and dropping the headspeed to use a 4 blade head will not leave me enough tail control as the model is. That will need more development.
Those are the things I found after a lot of messing around and wasted time. You may fare better doing it differently but right now, it flies nicely and I am going to leave it as it is. There is a video of the its first flight at
http://www.youtube.com/watch?v=AF1zNMGDI8s&feature=youtu.be