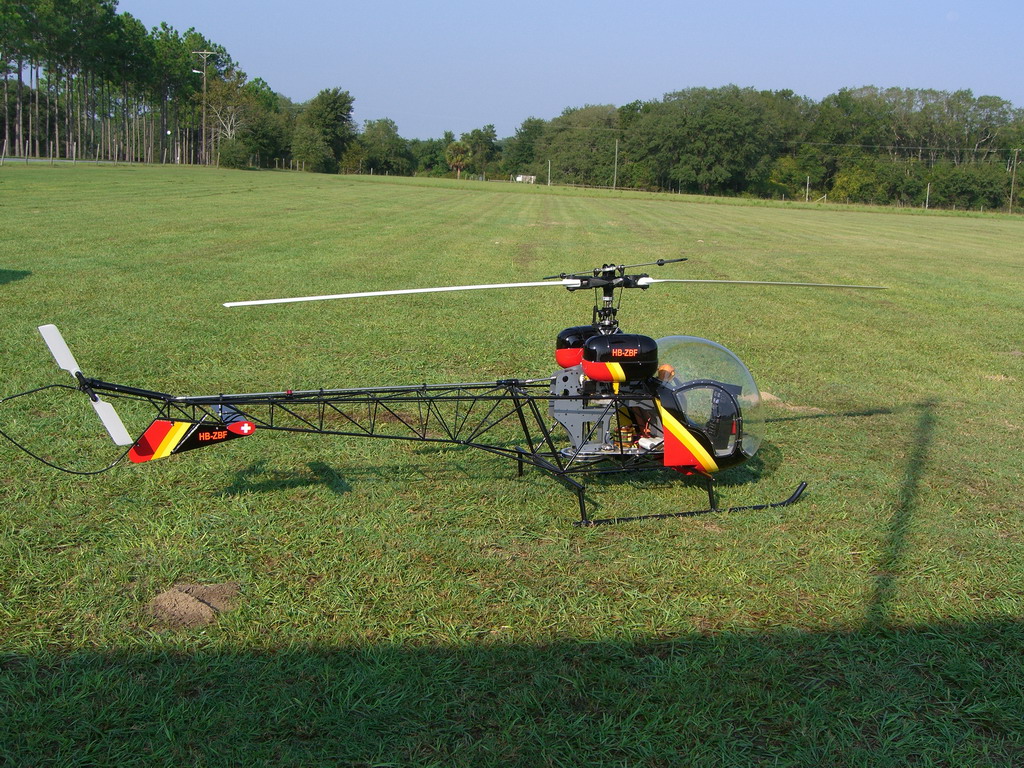
Electric 1/4 scale 47G
After my unfortunate experience with my Vario Mi-2, Vario very generously offered me an excellent deal on one of their 1/4 scale 47G3's. Way to good a deal to pass up so I indulged myself. The only problem with it was the Zenoah gas engine! That had to go. In its place was going to be an electric motor and this would allow me to scale up the motor area as it will be much smaller than the G23 and make less heat. Also, there will be no fuel tank, but there will be a lot of batteries.
I wanted to keep the existing drivetrain for simplicity, and I wanted to use the clutch to ease the load on the motor with those big 1050mm blades. I intended to use A123 batteries and as I had so much success with my 430 using a 15s 2p pack. I elected to go with that again. That left me with a terminal voltage of around 54V off load. The G23 wants to run at 9-10,000 rpm so I needed a motor which would give me 2HP+ at 10,000 rpm on 38-40v. Why 38v? Well that's the sort of voltage I would expect from the battery pack when loaded up.
My first test was with a Hyperion 5025-20 and this turned in a little slow at 830 rpm on the head. I wanted 900+ and so I tried an AXI 5330/18 which had a Kv (RPM per Volt) rating of 259 as opposed to the Hyperions 235. That should put me right on the money at 900 rpm and allow me to turn the speed down a little using the governor function on the controller.
I was forced to go with the very expensive Schulze 160/40 controller as this was the only one which I could find which could cope with a 12s Lipo pack (nominally 50v) and I was using a 15s A123 pack which nominally was 54v. I wonder if a lower voltage rated controller would work as the volts on load would be lower? I expect some of the electronics would be rated at a maximum voltage and putting a higher voltage in will blow them up. I'll save that experiment for another day!
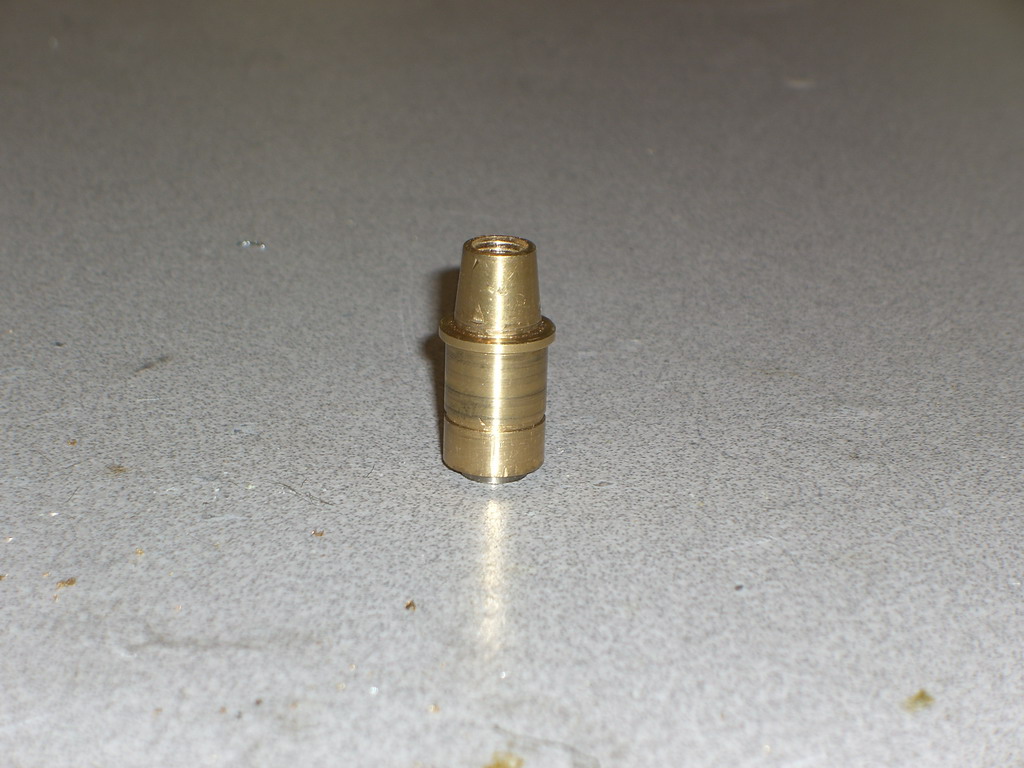
The first thing I had to do was to modify the brass part which coupled the motor to the clutch. Unfortunately this had the correct taper outside, but where it fitted over the motor shaft I needed it 8mm parallel.
So I chopped the good bit off after drilling an 8mm hole through the center
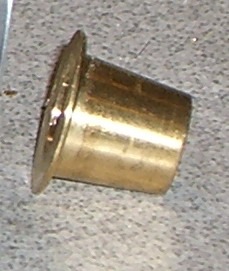
Then I machined up a piece to replace the bottom section.
Simple enough. Now this is the order in which it all goes together
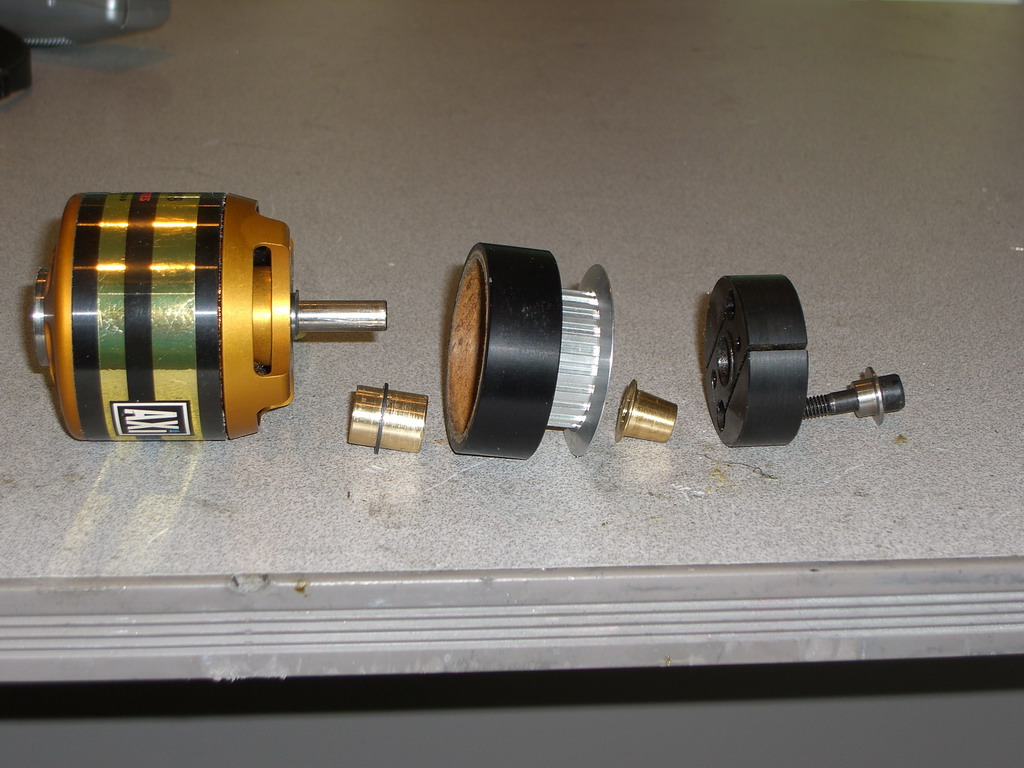
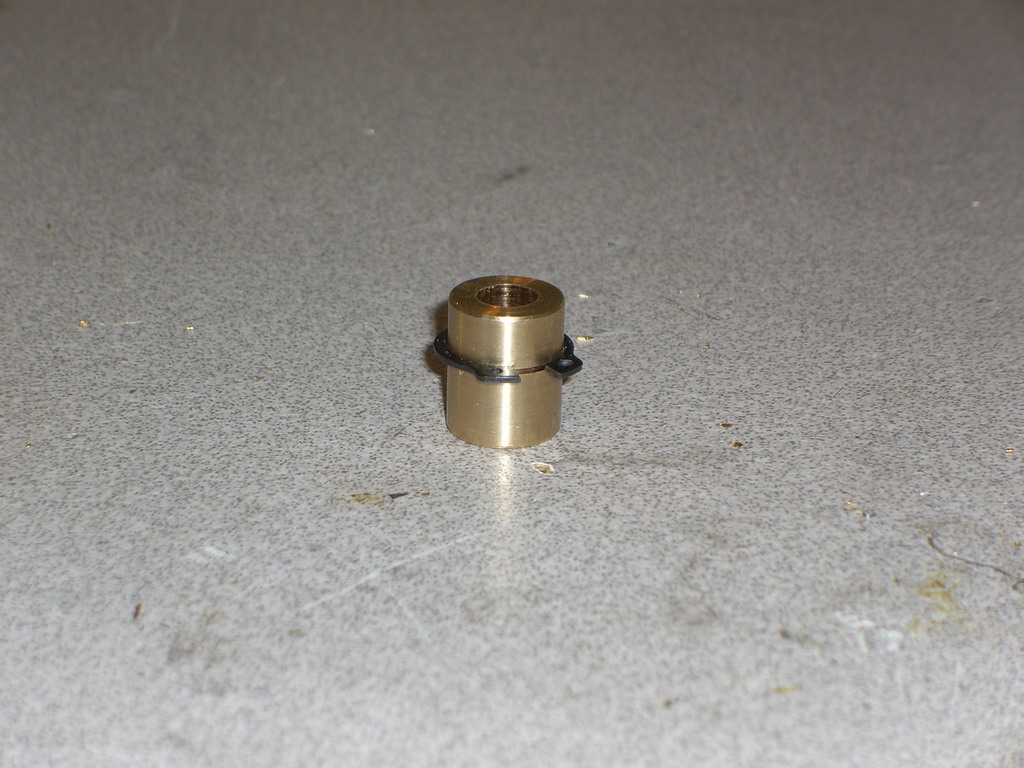
I had drilled and tapped the center of the motor shaft 6mm to take the clamping bolt and had to cut 10mm off the end of the bolt to get the right length. Fortunately it does not need to be clamped together really tightly like on the gas engine. This because the gas engine give one power pulse per revoltion. This motor has 18 poles so we get 18 pulses per revolution and its much smoother.So, I can tighten the hex bolt down onto the circlip on the motor shaft without having to mash it down tight.
Assembling a new motor mounting plate was quick and this is what the finished mechanical system looks like
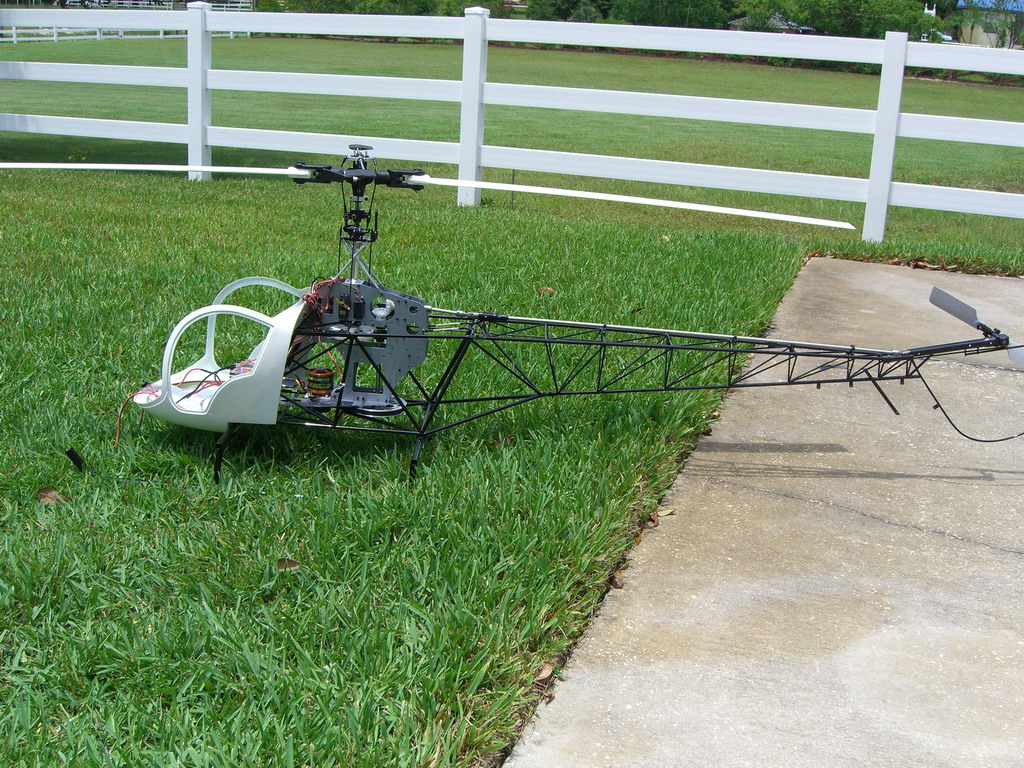
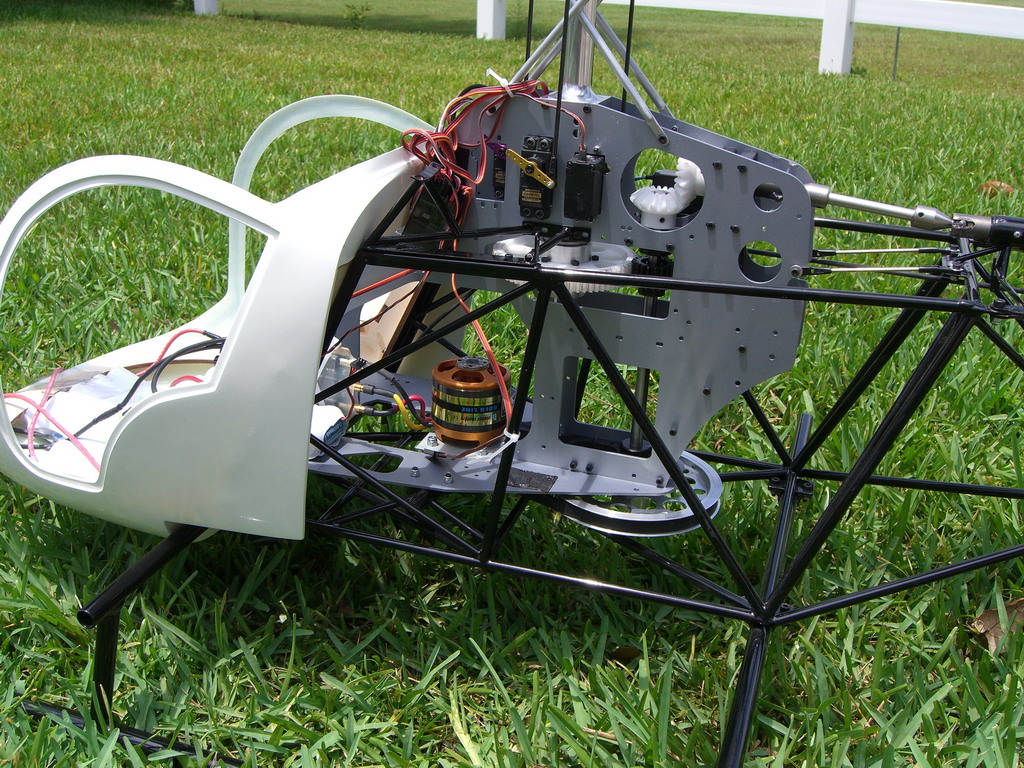
30 A123 batteries power the model in a 15s 2p configuration giving 8-10 minutes flying time, with a headspeed of 860 rpm
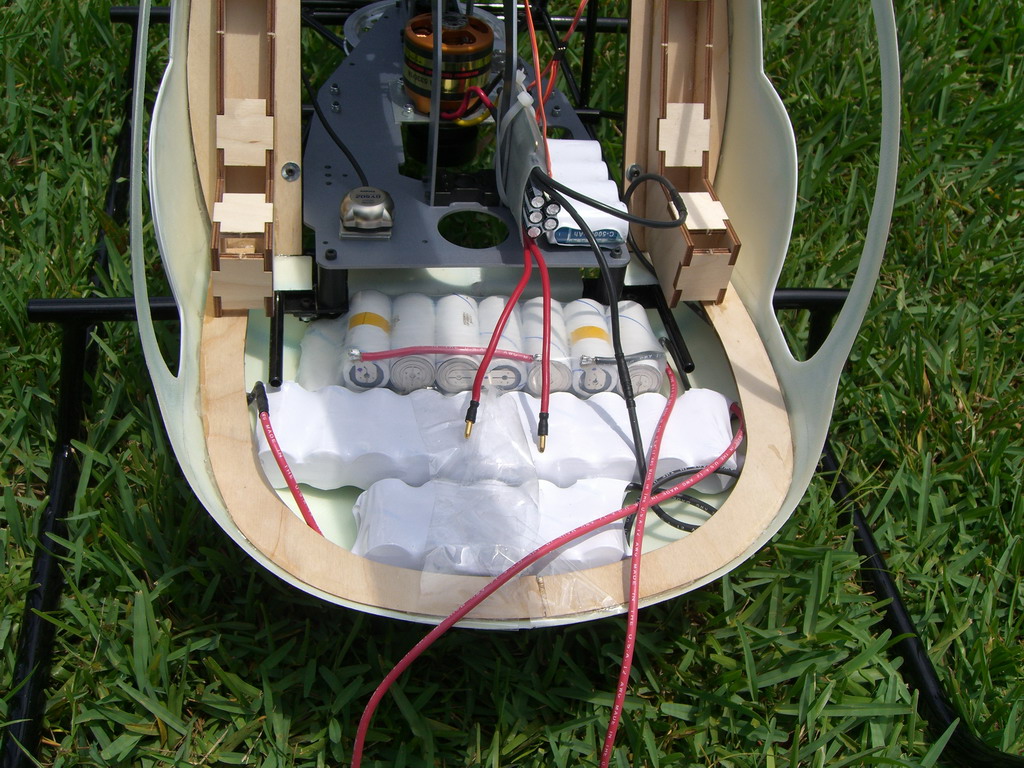
Fitting the cabin floor over the front set is going to be a challenge, but that's for another day. Now its flying, its ready for tidying up, painting and finishing off the cabin. Shortening the power cables will help with power losses. The final temperatures were well within spec at 140 for the motor, 120 for the controller and 110 for the battery. On an 80 degree day, that's hardly any rise at all.
I have been checking out the Schulze web site and find the 160.40 controller will cope with 16 A123's and their new chargers due for release this summer will be able to charge them. When I return from the uk in September, thats the way I'll be going.
UPDATE
I increased the battery size to a 17s 2p A123 pack to get the headspeed up to 900 rpm. This worked very well for a while and then I started to notice shortening flight times. One cell in one of of the packs had gone short circuit and was disharging the other pack gently though it. Finding the shorted cell was a pain and after replacing it and getting a few more flights, another cell went down. I replaced the whole battery pack and still this problem occurred so I gave in and converted it it all to a 15s LiPo pack with 5AH batteries from Hobby King. The price was ridiculously low so I had to do it. The cabin floor was made removeable by holding it in place with magnets and I could get the packs up out of the model to charge them. Darrell Sprayberry saw the potential in this conversion as it would fit several Vario big models, so he designed and manufactures an adaptor which allows the clutch to be fitted to the motor without drilling and tapping the motor shaft. The final change I made was to remove the "Schulze PopTart" ESC and replace it with a Kontronic Jazz 200 Amp controller. This has the ability to cope with 15s lipos and has the advantages of a no spark connection setup and a built in cooling fan. So far it has worked perfectly